You should always disable external access to Exchange Control Panel (ECP). You don’t want a brute force attack on ECP in Exchange Server. It’s a big security risk. The best approach and my advice are to block it on the firewall. The firewall is the first point that will block external access. If it’s not possible to do it on the firewall, do it on the Exchange Server. It’s better than not disabling ECP. Let’s look at how to disable external access to ECP in Exchange Server.
Do you have more than one Exchange Server? Do the steps below on all the Exchange Servers accessible from external.
Install IP and Domain Restrictions role
To install the IP and Domain Restrictions role, follow the steps below:
- Sign in to Exchange Server
- Start Server Manager
- Click on Manage > Add Roles and Features
- Follow the wizard and select the Exchange Server
- Go to the Server Roles tab
- Expand Web Server (IIS) > Web Server > Security
- Check the IP and Domain Restrictions role
- Click Next
- Finish the installation
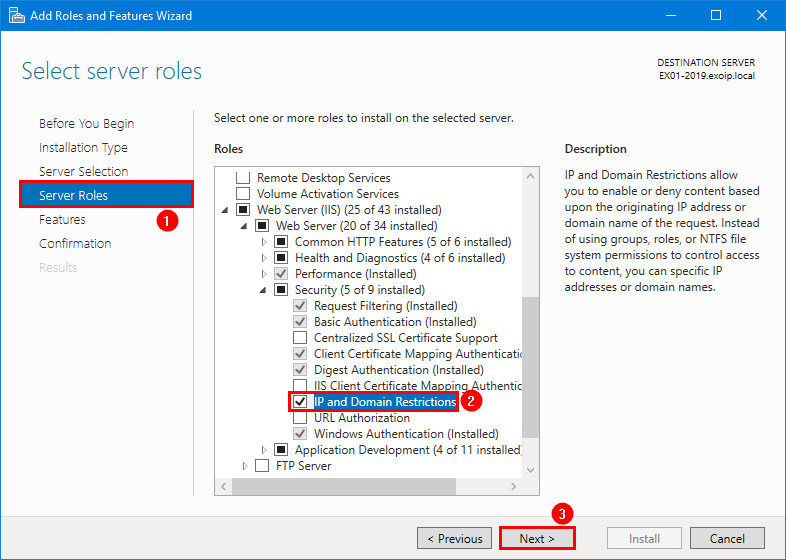
You did successfully install the IP and Domain Restrictions role. Proceed further with the steps below.
Start IP Address and Domain Restrictions in IIS
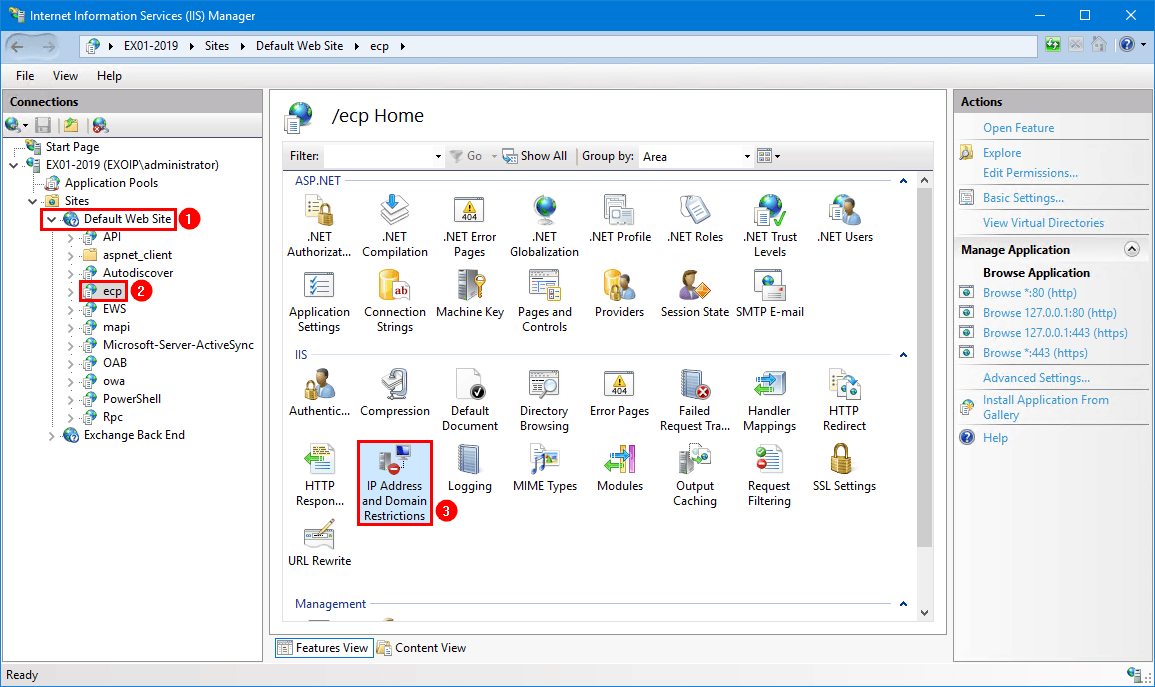
Follow the steps below to start IP Address and Domain Restrictions:
- Open IIS Manager on the Exchange Server
- Expand Site > Default Web Site
- Click on ecp
- Double-click on IP Address and Domain Restrictions
Note: You must first click on ecp and then double-click IP Address and Domain Restrictions.
Edit feature settings
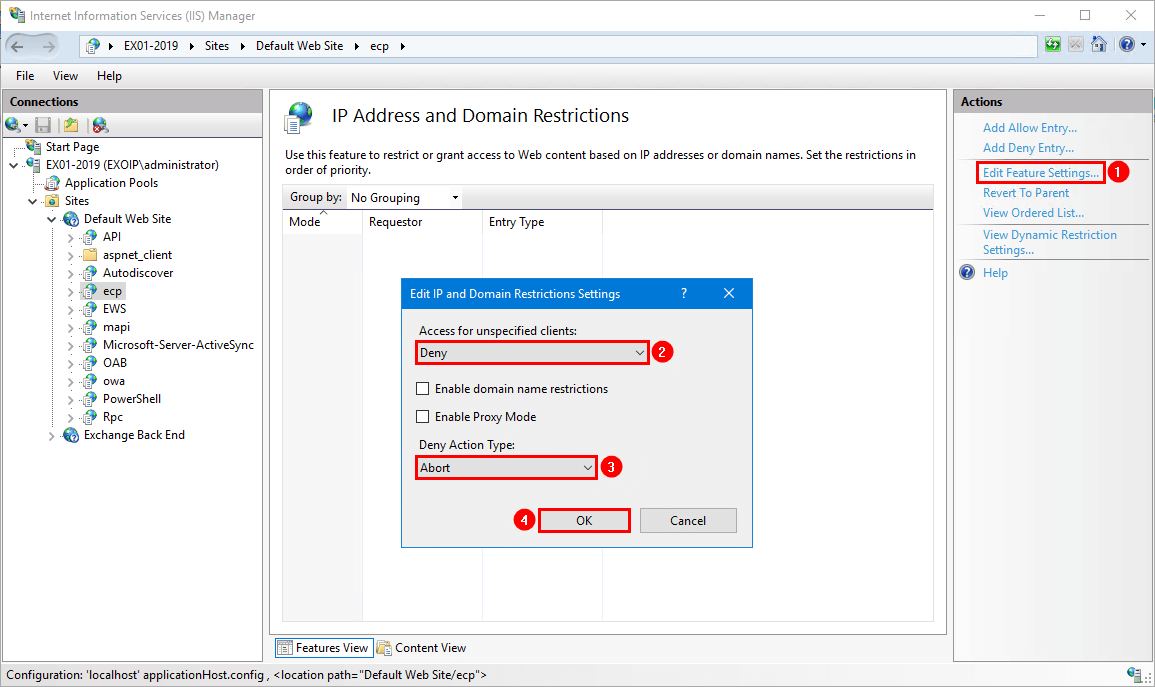
Disable external access to ECP on Exchange Server by following the steps below:
- Click on Edit Feature Settings
- Set the Access for unspecified clients to Deny
- Set Deny Action Type to Abort
- Click OK
Add allow entry
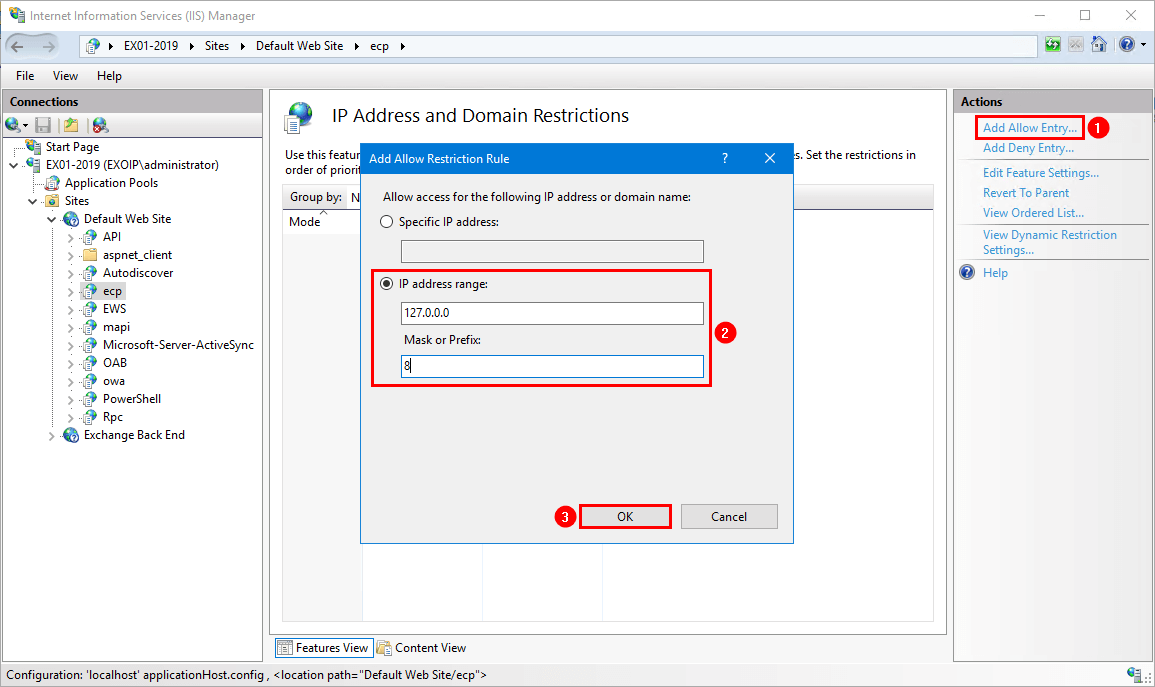
Allow localhost to access the Exchange Server:
- Click on Add Allow Entry
- Add the IP address range 127.0.0.0 with prefix 8
- Click OK
Suppose you want to add the subnet mask instead of the prefix. That will be 255.0.0.0.
Add other IP addresses to the allow list.
Note: It’s not recommended to allow ECP access on the whole internal LAN. If you have management servers, add the IP addresses to the allow list.
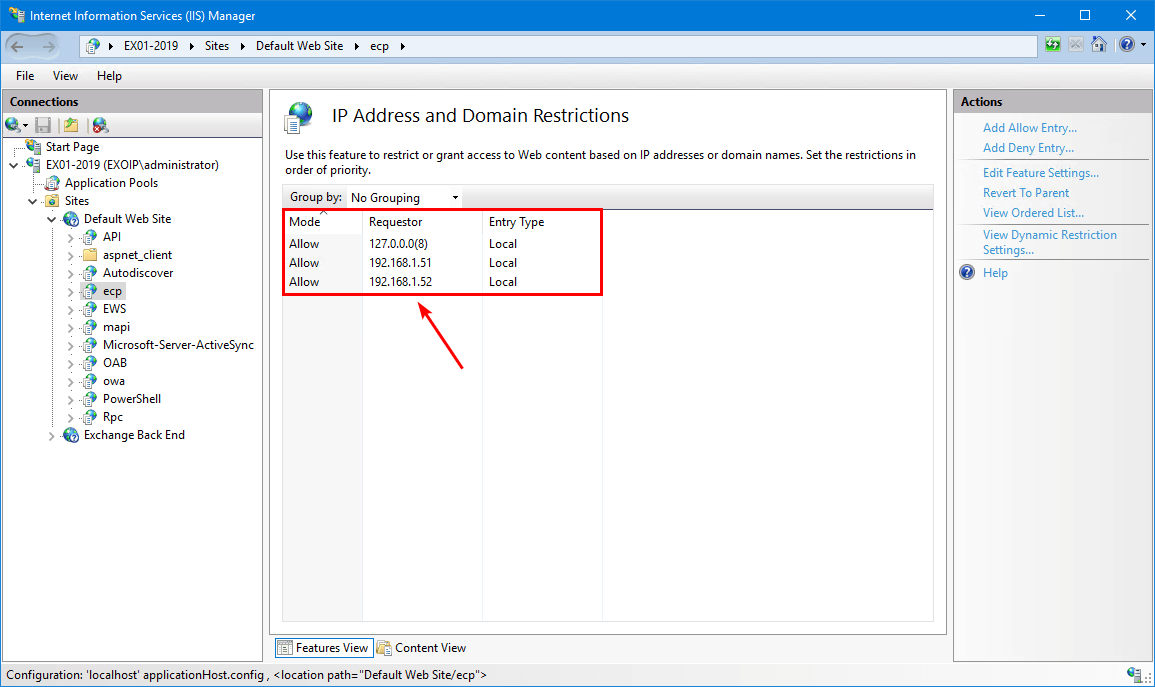
In our example, we have the following systems in the allow list:
- 127.0.0.0(8) (localhost)
- 192.168.1.51 (Management Server)
- 192.168.1.52 (Exchange Server)
Verify access to ECP
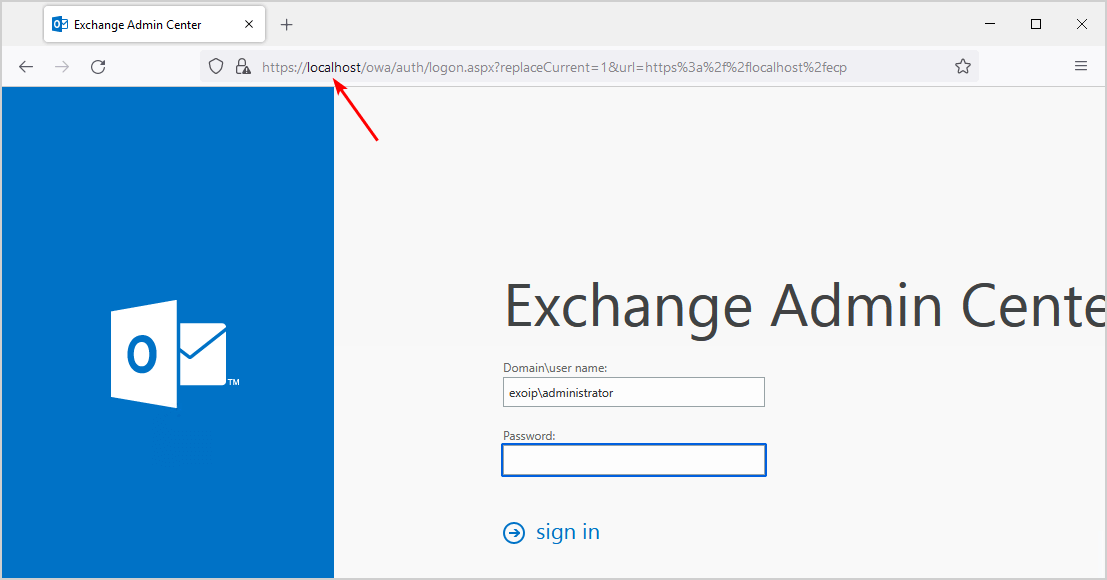
Start ECP from the Exchange Server. Make sure you insert the local hostname https://localhost/ecp. You do see the sign-in screen, and you can successfully sign in.
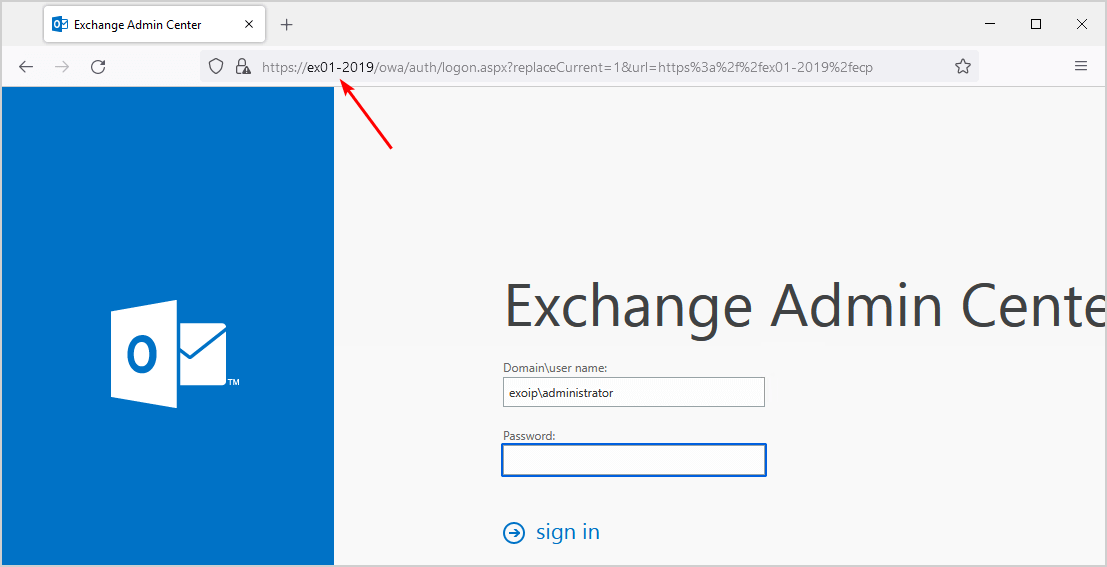
Start ECP from the IP addresses on the allow list. Make sure you insert the Exchange Server hostname. For example, https://EX01-2019/ecp. You do see the sign-in screen, and you can successfully sign in.
Note: Navigating to the Exchange Server hostname ECP (https://EX01-2019/ecp) from the Exchange Server will not work. However, it will work on other allow-listed systems. Instead, use localhost or the internal DNS name.
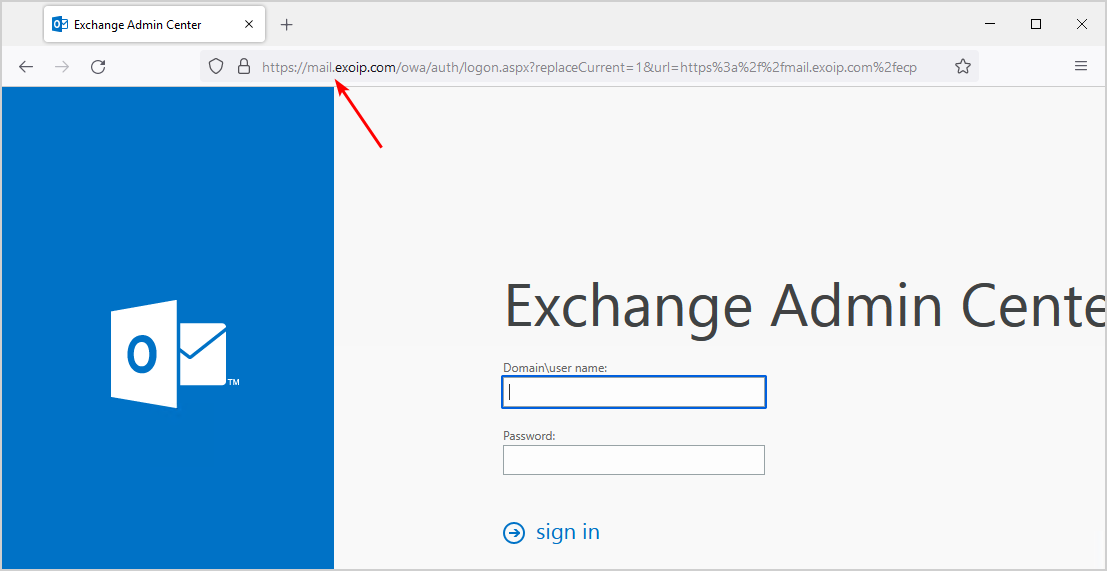
Start ECP from the IP addresses on the allow list. Make sure you insert the Exchange Server internal DNS. For example, https://mail.exoip.com/ecp. You do see the sign-in screen, and you can successfully sign in.
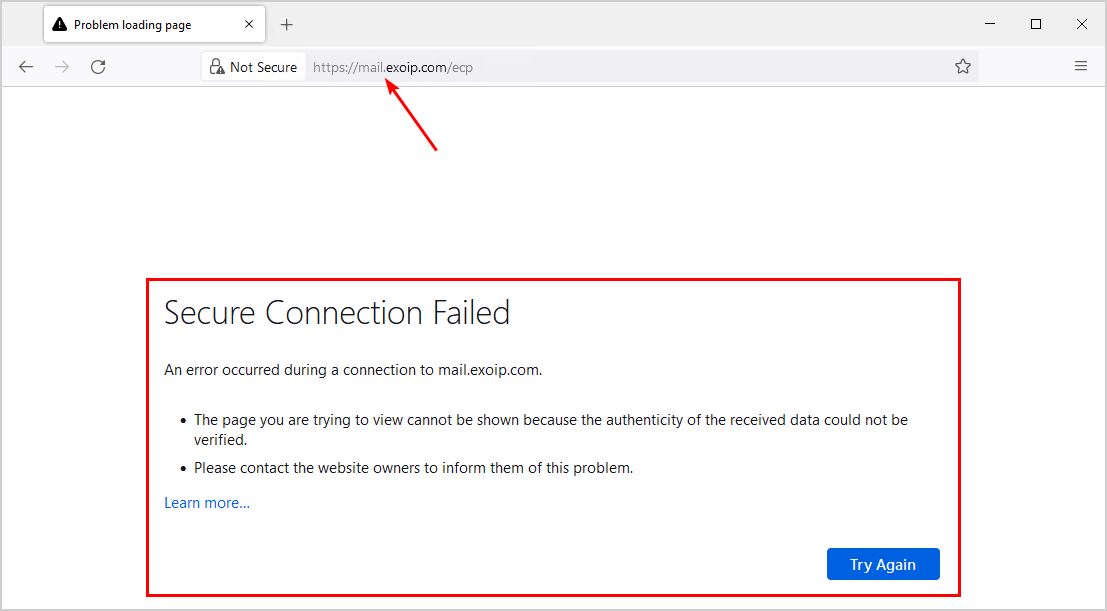
Start ECP from an external or non-added IP system. It will not show the Exchange Admin Center (ECP) and abort the connection.
That’s it!
Conclusion
You learned how to disable external access to ECP in Exchange Server. The IP Address and Domain Restrictions is one of the great built-in features which allows to selectively permit or deny access to ECP in Exchange Server. Remember to test after you apply the configurations. Think smart before allowing access to ECP.