Introduction
In a previous post you reviewed what Windows Information Protection (WIP) is and how you can configure Intune to use it, you then deployed a WIP policy to a group of users and verified the end result on a Azure AD joined (with Auto-MDM enrollment) Windows 10 version 1703 device.
If you are still not familiar with WIP then I’d recommend you review this blog post from Microsoft, it covers it really well. The graphic below also gives you a nice indication of where WIP fit’s in to your information protection needs and how it fits neatly into the Data Separation and Leak Protection space.
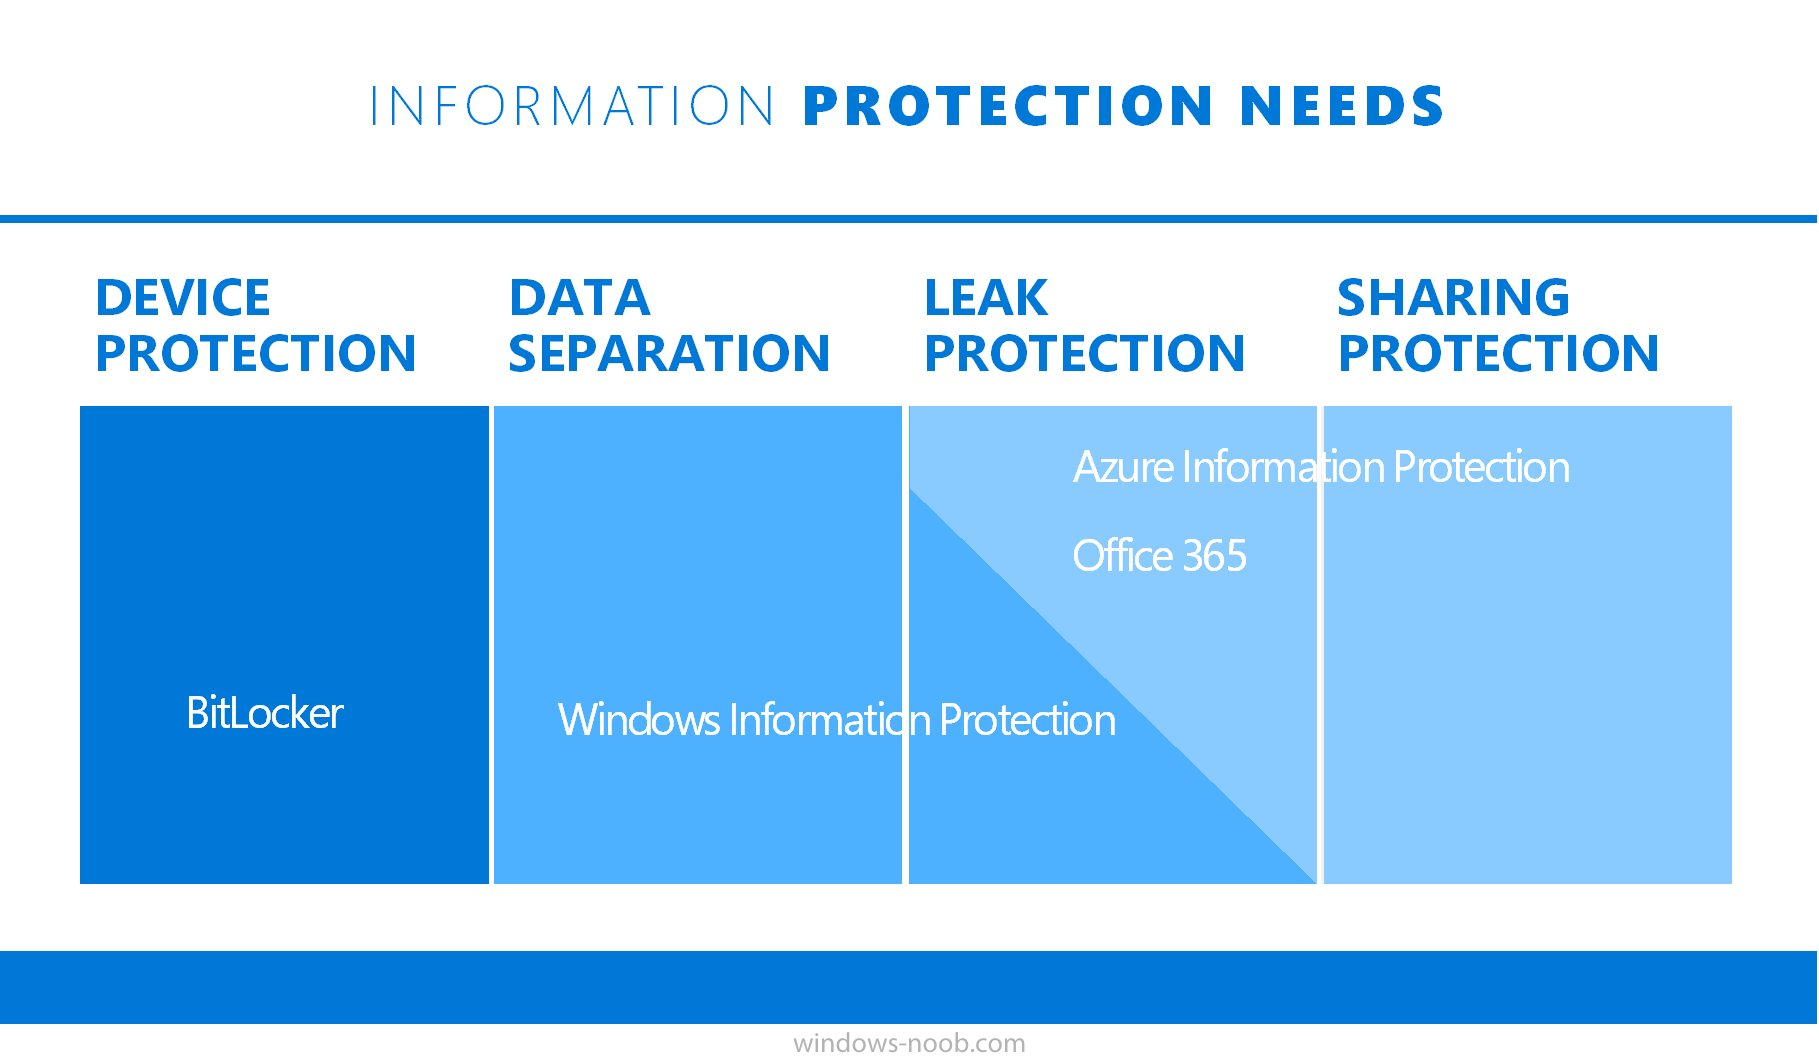
In this post, you will see how WIP works on a Windows 10 version 1703 device that is Azure AD registered and not enrolled into MDM (MAM-WE). This is a typical Bring Your Own Device (BYOD) scenario.
Create a WIP policy for Windows 10 devices without enrollment
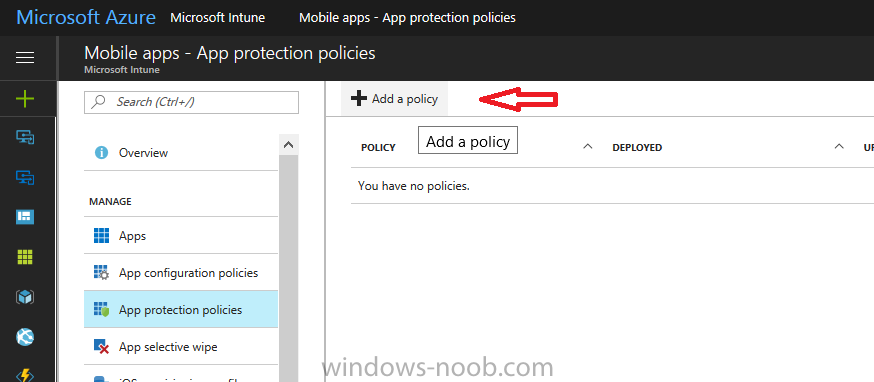
In a previous post you configured MAM in Azure, and now you will create a WIP policy for Windows 10 devices that are not enrolled into MDM, this will give you additional options to configure in the advanced section of the WIP Policy. To create the WIP Policy in the Microsoft Intune service in Azure, select Mobile Apps then click on App protection policies. Next click on Add a Policy.
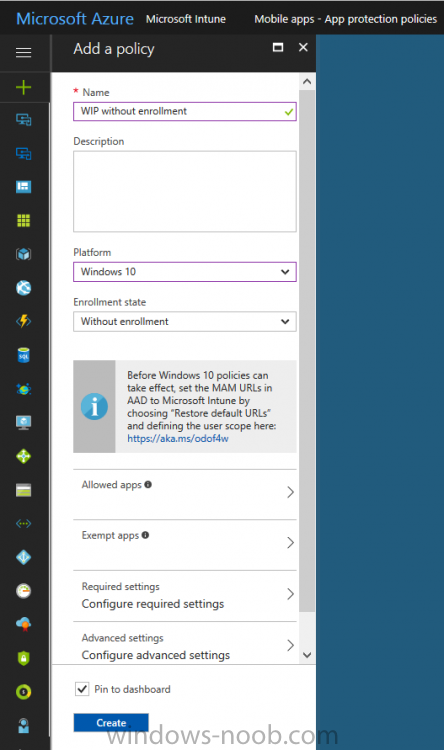
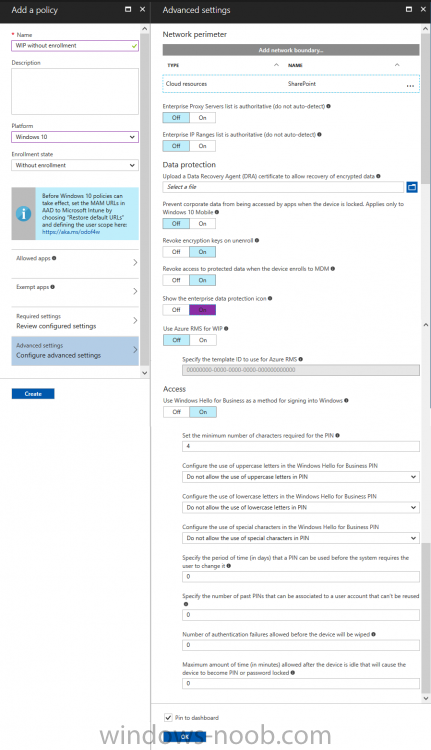
Give the policy a descriptive name, and optionally a description of what it does, in the Platform drop down select Windows 10 from the choices available. Next choose your enrollment option for Enrollment State, select Without Enrollment.
Note, if you select the wrong enrollment option you cannot change it later, you’ll have to recreate the policy with the correct enrollment option.
Next, there are two sections in the Create Policy wizard related to Apps.
- Allowed apps – These are the apps that must adhere to the policy
- Exempt apps – These apps are exempt from the policy and can access enterprise data freely.
Note: Apps can be enlightened or unenlightened. Enlightened apps can differentiate between corporate and personal data, correctly determining which to protect, based on your policies. Unenlightened apps consider all data corporate and encrypt everything. For a list of Enlightened apps see here.
Adding Allowed Apps
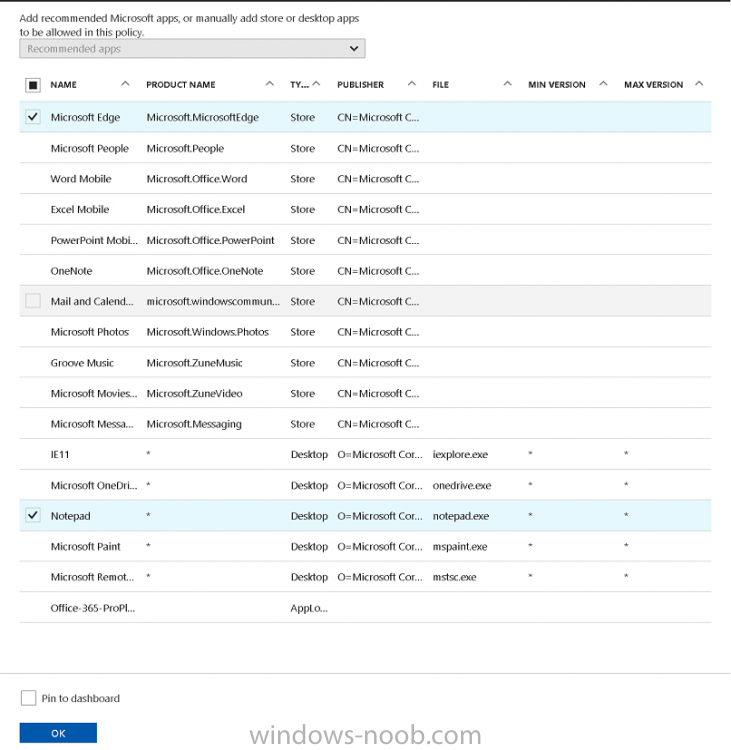
Click on Allowed apps and then click on Add apps to add one or more apps that you want to adhere to the policy. There’s a drop down with Recommended apps selected by default and those apps are listed below the drop down.
- Recommended apps: a pre-populated list of (mostly Microsoft Office) apps that allow admins easily import into policy.
- Store apps: Admin can add any app from the Windows store to policy.
- Windows desktop apps: Admin can add any traditional Windows desktop apps to the policy (e.g. exe, dll, etc.)
If you want to add your own Store apps or Desktop apps manually then you’ll need to select the appropriate option and fill in the blanks. To get information about how to generate the info needed for manually adding Store and Windows desktop apps see this post.
To add Allowed apps, click on Add apps, then select Recommended apps and make your selection from those available. For the purposes of this guide select Microsoft Edge and Notepad from the list of apps available.
Click OK on the Recommended apps page, then click on OK on the Add apps page, next you will add an additional desktop app such as Microsoft Word 2016, to do so use the following method.
Click on Add apps, and from the drop down choose Desktop Apps. Fill in the following information in the blanks.
- Name: Microsoft Office 2016
- Product Name: *
- Type: Desktop
- Publisher: O=Microsoft Corporation, L=Redmond, S=Washington, C=US
- File: winword.exe
- Min Version: *
- Max Version: *
Note: if you get the Publisher information above wrong, for example a missing letter, or misplaced comma or a missing space, then the policy (for Microsoft Word) will fail to apply and it won’t work. You can pick a built in desktop app like notepad and compare the publisher settings to your app.
Here is a copy of the data used above:
NAME			PRODUCT NAME 	TYPE 	PUBLISHER 						FILE 		MIN VERSION 	MAX VERSION
Microsoft Office 2016 	*		Desktop	O=Microsoft Corporation, L=Redmond, S=Washington, C=US	WINWORD.EXE	*		*
And below is what it looks like after you’ve added it correct, compare the Notepad desktop app with the one you just added, the Publisher line must match exactly.
Adding Exempt Apps
Next click on Exempt apps, and add the Company Portal to allow the app to properly function. To do so, add the following Store app to the list of Exempt apps:
- Name: Company Portal
- Publisher: CN=Microsoft Corporation, O=Microsoft Corporation, L=Redmond, S=Washington, C=US
- Product Name: Microsoft.CompanyPortal
as shown here
Click OK when done.
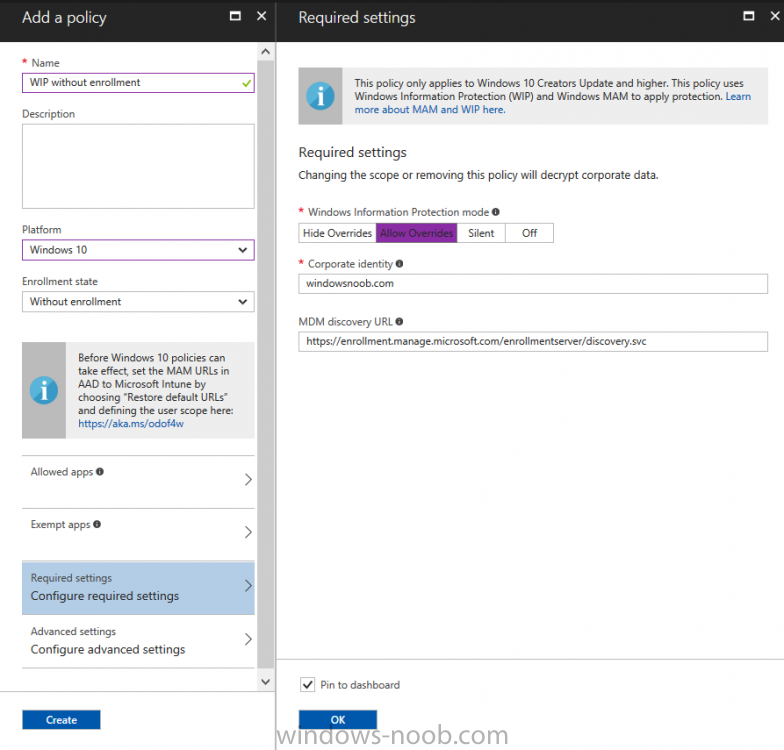
Next click on Required settings and configure the protection mode, in this example set it to Allow Overrides, remove Pin to Dashboard and click on OK.
Note: Allow Overrides lets the user override the policy and share the data, logging the action to your audit log.
The 4 available Windows Information Protection mode settings are listed below.
- Hide Overrides – WIP looks for inappropriate data sharing practices and stops the user from completing the action. This can include sharing info across non-corporate-protected apps, and sharing corporate data between other people and devices outside of your organization.
- Allow Overrides – WIP looks for inappropriate data sharing, warning users if they do something deemed potentially unsafe. However, this mode lets the user override the policy and share the data, logging the action to your audit log.
- Silent – WIP runs silently, logging inappropriate data sharing, without blocking anything that would’ve been prompted for employee interaction while in Allow Override mode. Unallowed actions, like apps inappropriately trying to access a network resource or WIP-protected data, are still stopped.
- Off (not recommended) – WIP is turned off and doesn’t help to protect or audit your data. After you turn off WIP, an attempt is made to decrypt any WIP-tagged files on the locally attached drives. Be aware that your previous decryption and policy info isn’t automatically reapplied if you turn WIP protection back on.
Configuring advanced settings
Next click on Advanced settings, to configure advanced settings. Notice how you can configure Windows Hello for Business options in the policy. These Windows Hello for Business options can by targeted to a User group of your choosing (essentially the same User group that you assign the WIP policy to), which is useful if you don’t like the default Windows Enrollment option for enabling Windows Hello for Business (which applies to All Users).
Once you are done configuring it, click on OK and then Create to create the WIP policy.
Deploying the policy
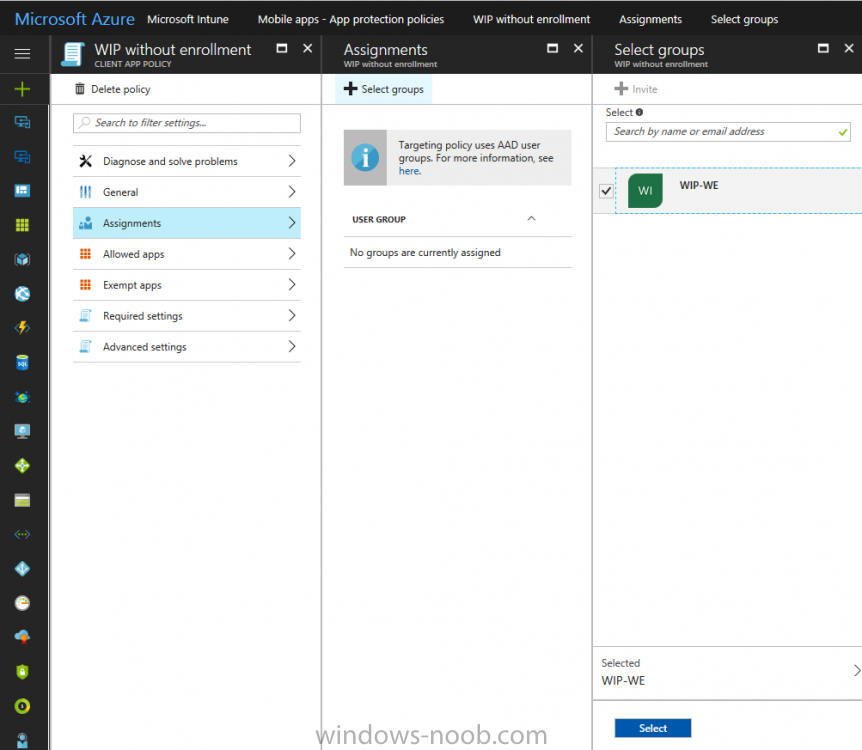
Now that you’ve created your WIP policy, it needs to be deployed (assigned) to a group of users that you intend to target with this policy. To deploy the policy, select it and then click on Assignments. Next click on Select Groups to select a previously created Azure Group containing one or more users.
After selecting a suitable user group, click on Select.
The policy is now deployed.
Registering a device in Azure AD (workplace join)
Let’s look at a Windows 10 device that is not joined to Active Directory or Azure AD, it is only work group joined (this is a typical state for BYOD devices).
Using an Administrative PowerShell cmd prompt, issue the following command
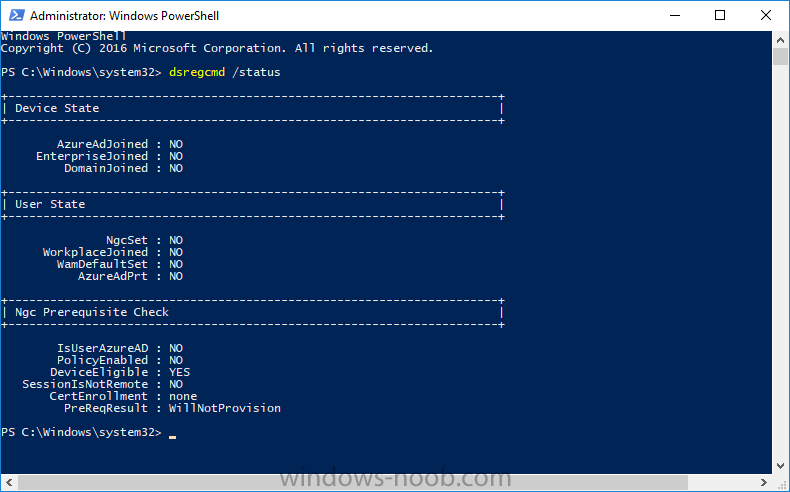
dsregcmd /status
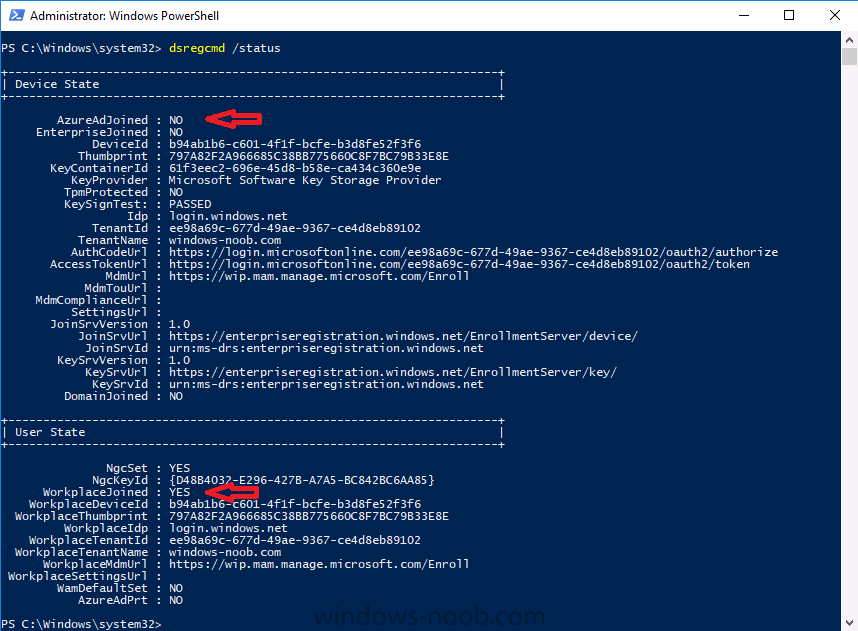
Output similar to the below should appear
As you can see from the output, the Windows 10 device is not joined to AAD, not Domain Joined and also not Enterprise joined (some future option from Microsoft ?).
- AzureADJoined: No
- EnterpriseJoined: No
- DomainJoined: No
To Azure AD register the device (workplace joined) do as follows:
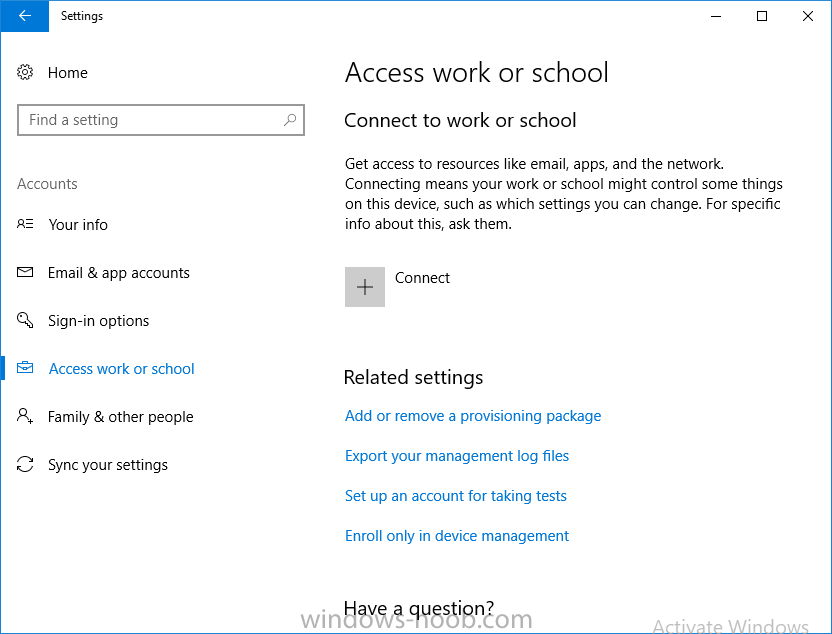
Click on All Settings, Accounts, Access work or school.
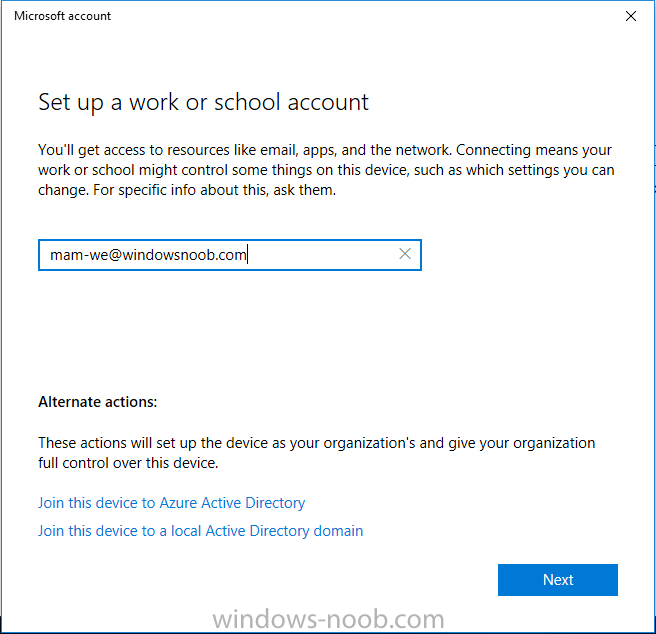
Then click on Connect and enter your Intune user credentials, note that their are options to join Azure AD and an on premise Domain but you will not select either as this device will be AAD registered only.
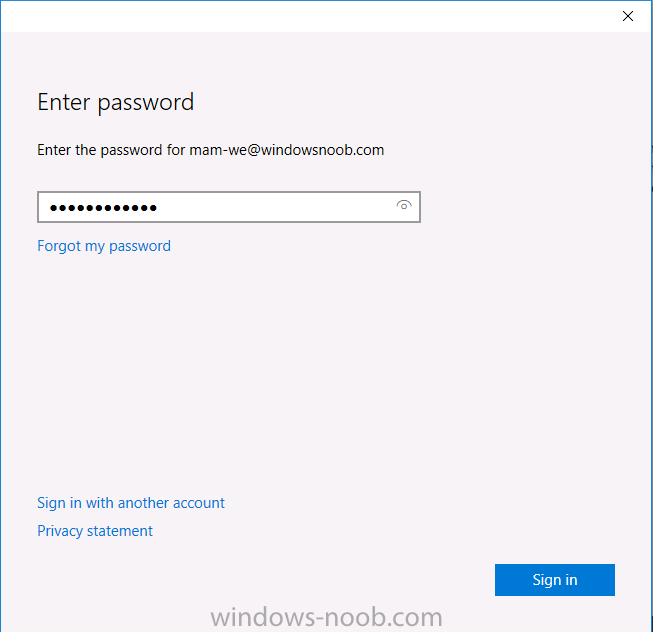
When prompted enter the password and click on Sign-in.
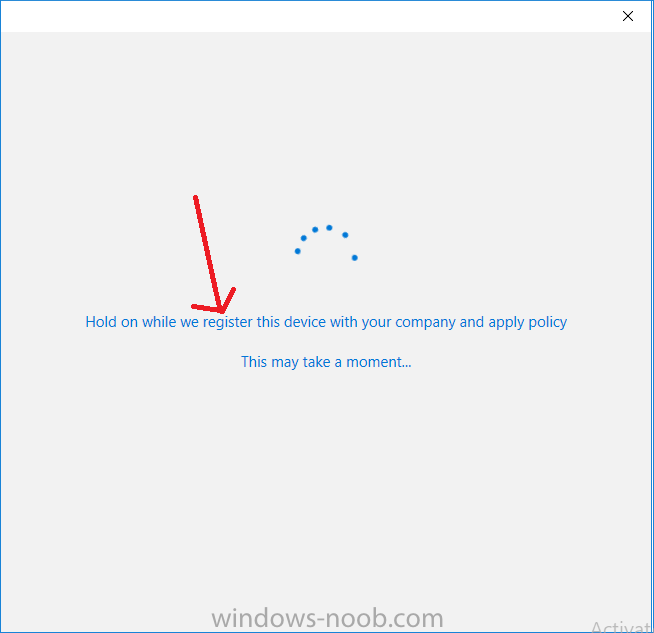
you’ll be informed about what is happening, note the ‘while we register this device’ text.
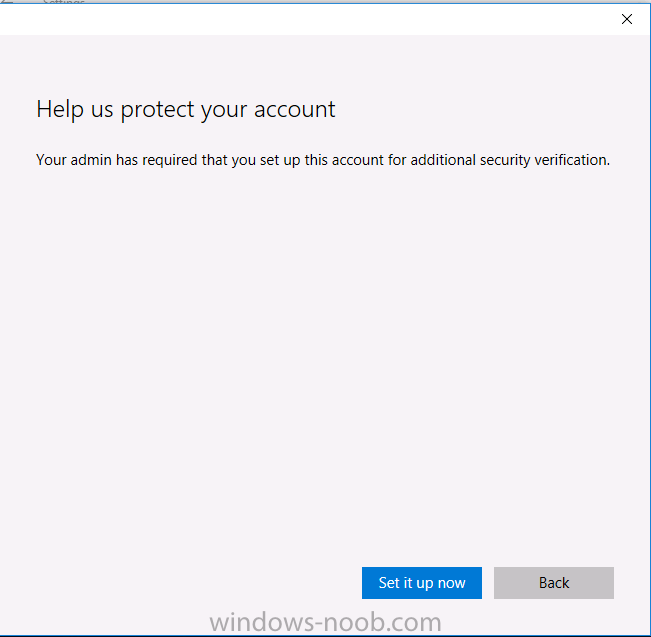
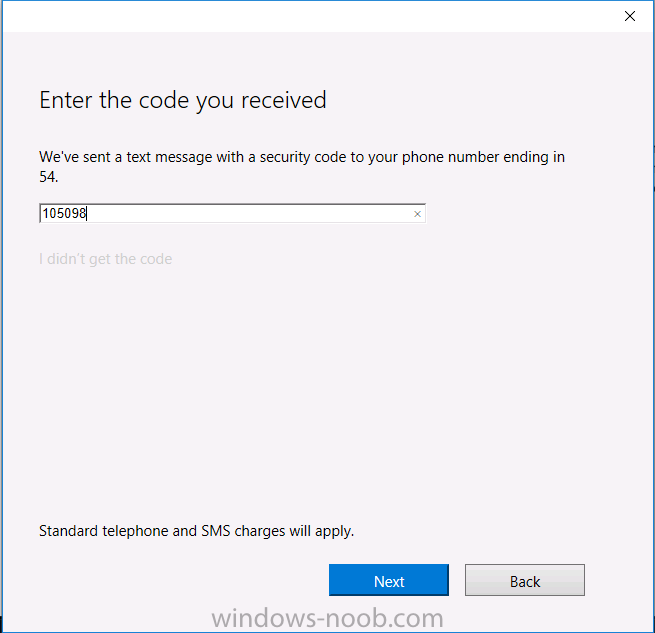
If any additional authentication is configured (Windows Hello for Business), you’ll be prompted to enter it.
after the text message is sent to your phone…
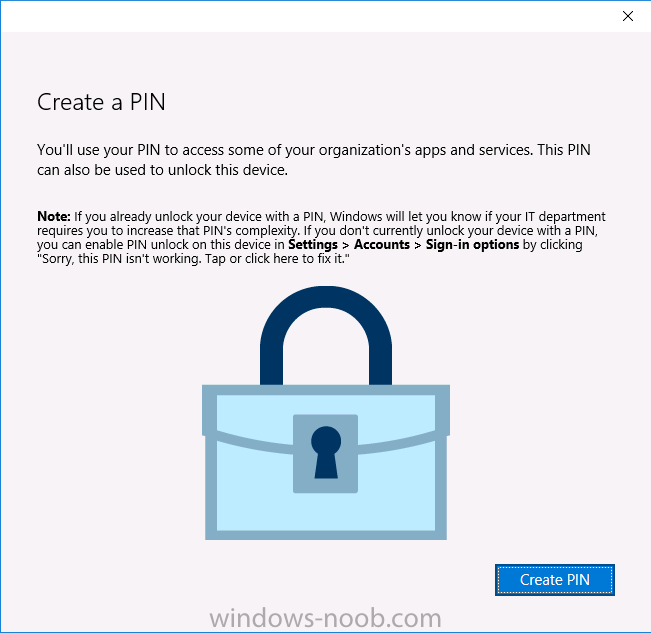
Click Next and then Setup a PIN
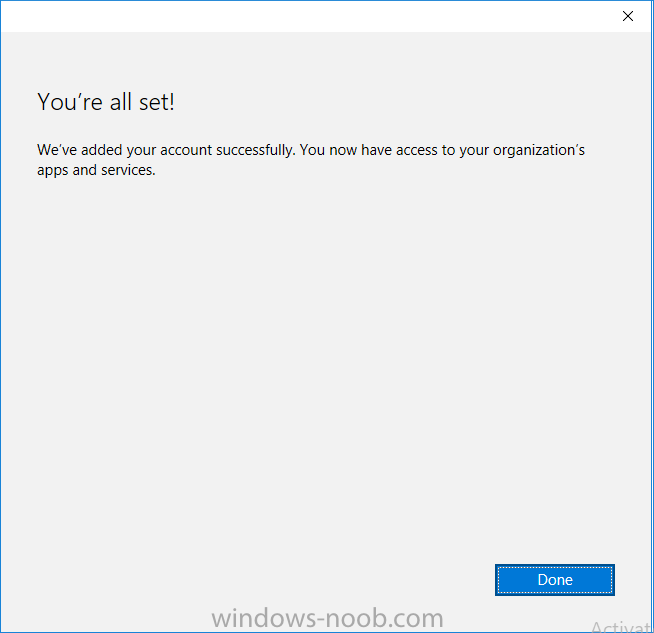
click next and then Done to close the wizard.
Note: The User name used to register the device is listed with a Windows icon beside it.
At this point, once again issue the dsregcmd /status command in an Administrative PowerShell cmd prompt.
From the output you can see that the device is NOT Azure AD Joined and it is Workplace Joined, which is another way of saying it is Azure AD registered. You can verify that the device is not MDM enrolled and that it is Workplace joined and Azure AD Registered by clicking on Azure AD devices in the Intune portal.
Workplace Join is made possible by the Azure Active Directory Device Registration service. When a device is joined by Workplace Join, the service provisions a device object in Azure Active Directory and then sets a key on the local device that is used to represent the device identity. This device identity can then be used with access control rules for applications that are hosted in the cloud and on-premises.
For more information about enabling Azure Active Directory Device registration service, see Azure Active Directory Device Registration Service Overview.
Review WIP policy on a Windows 10 device
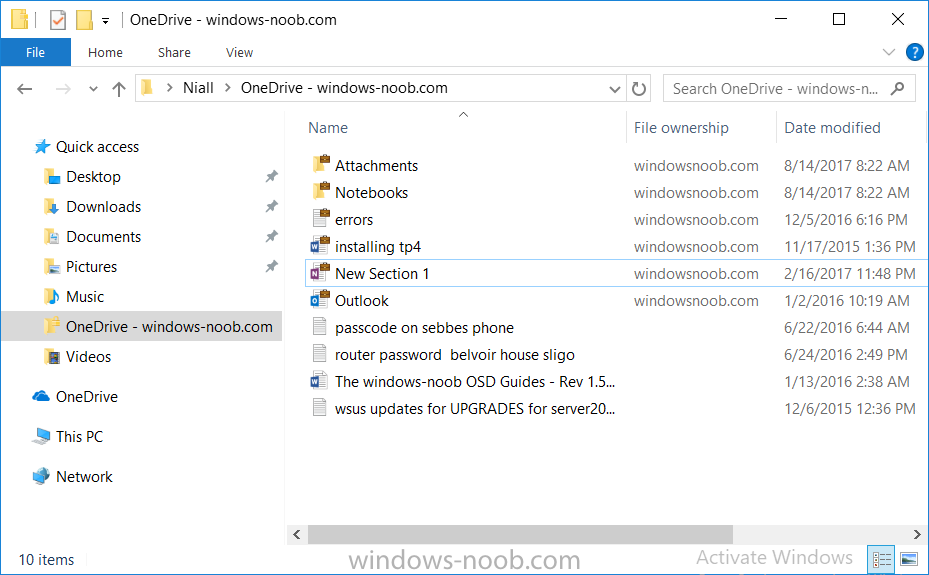
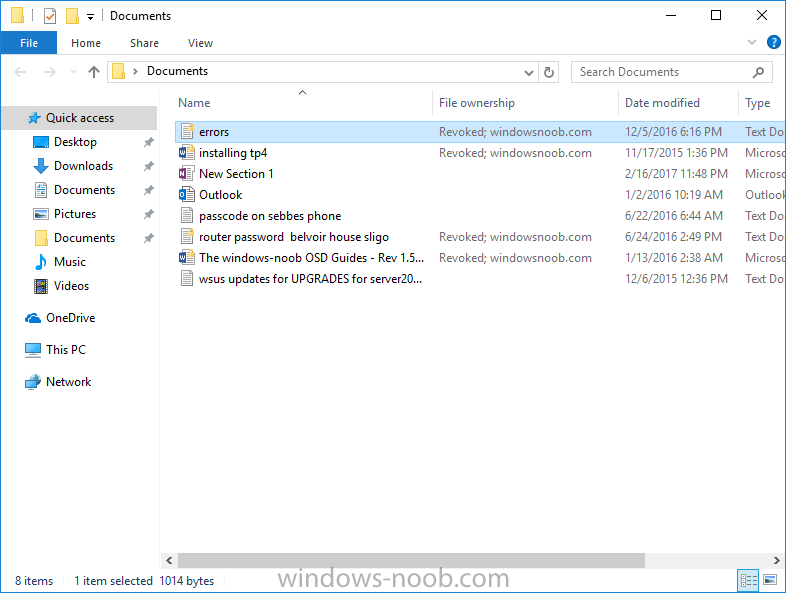
So now that our Windows 10 device is Azure AD registered, let’s verify how the WIP policy applies. To do so logon to the Windows 10 device used above. In the example below there are some documents, some are marked as Work (they have a suitcase icon on them and File Ownership is listed as the windowsnoob.com Enterprise.) and some are Personal.
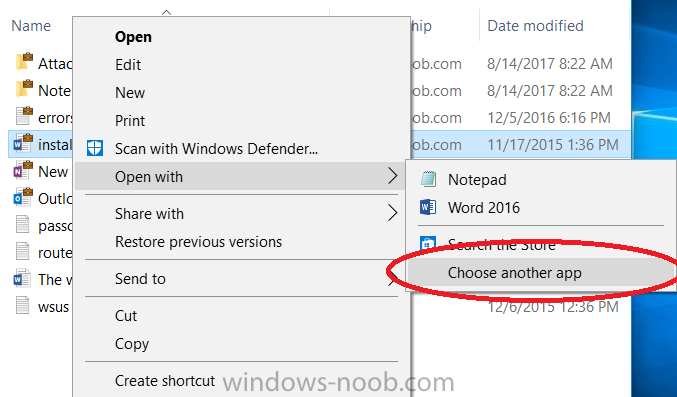
Right click on a protected Word document and choose Open With, next select Choose another App.
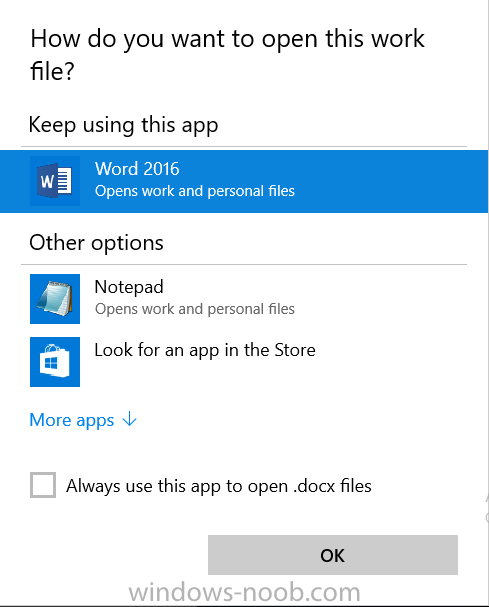
if your policy is applied correctly you’ll see the following (that Word 2016 can open both Work and Personal files), if not, sync the policy again and try again.
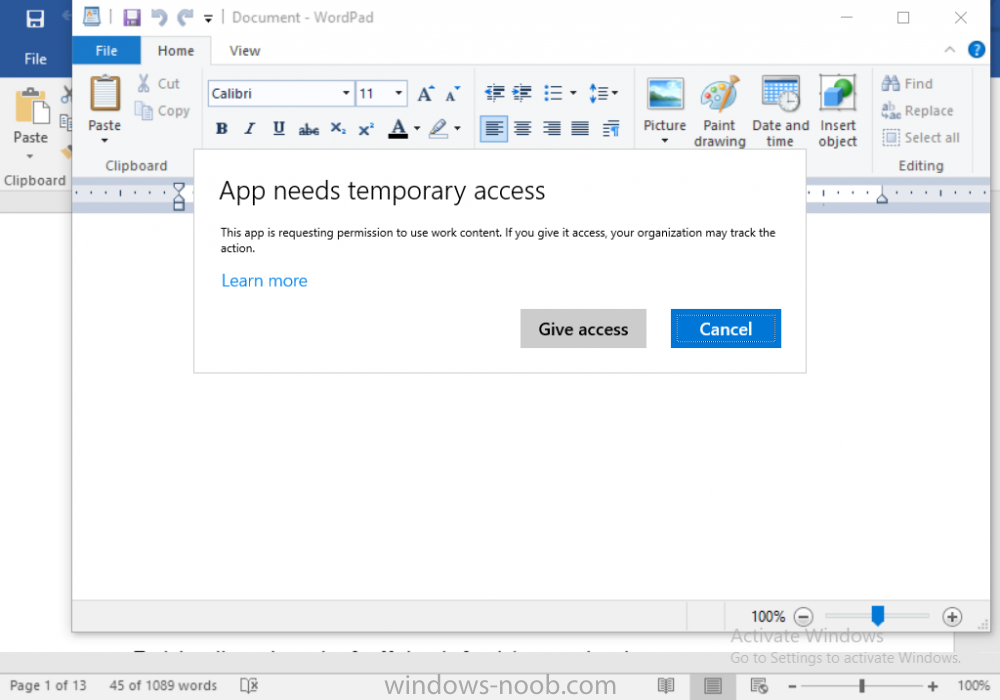
Once the document is open in Word, copy some text and attempt to paste it into WordPad (which is not an allowed app.) If everything went well you’ll be prompted to either Give Access or Cancel.
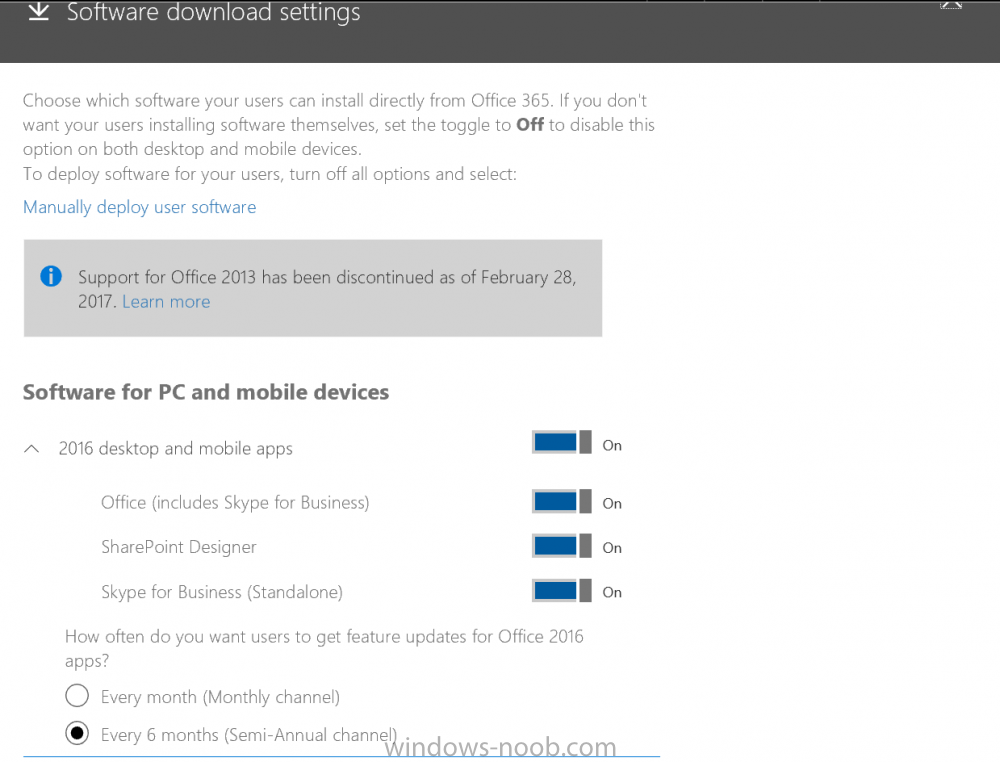
Note: If you do not get the desired result, for example if the data simply pastes in, then you should verify the version of Office application you are using is up to date. For example, Office 365 may be on the Deferred Channel (now called Semi Annual Channel) meaning that it’s version is 1701.(xxxx.xxxx) and that may mean that it cannot process the WIP policy correctly. Once you’ve updated Office 365 to the Current Channel (now known as Monthly) you’ll get the desired result.
Tip: You can review your software download settings for Office 365 by going to https://portal.office.com and, clicking on Software Download Settings on the main screen. In there, by default it will be set to the Semi Annual Channel which as of when I tested it in this guide, won’t work correctly with WIP. In the screenshot below you can see that Office is configured for the Semi Annual Channel. As time goes on this will auto-correct itself, but if you see issues such as I’ve described then select Monthly Channel, update the office software on the client, and try again.
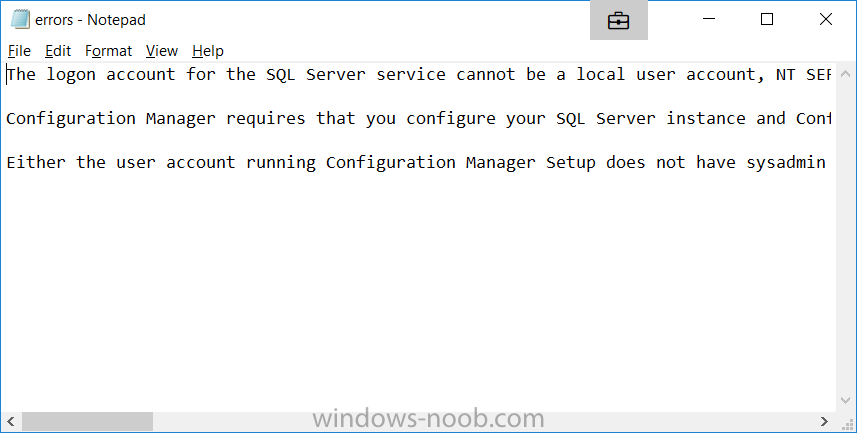
Next, open a protected (work) txt document with Notepad. Notice the suitcase icon in the banner area. If you click on the suitcase, it will say Managed by your company.
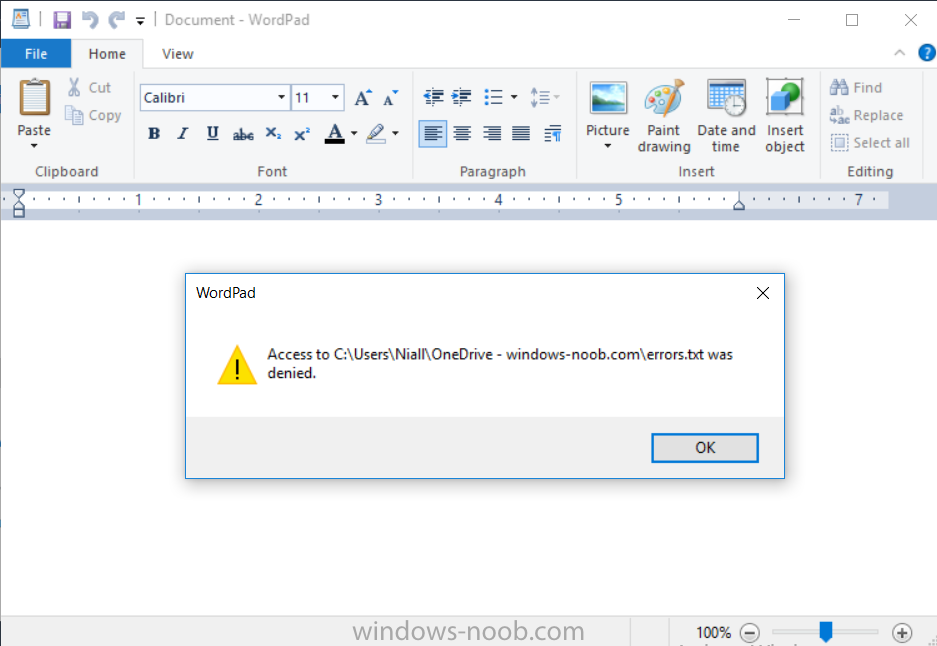
Try opening the same document with an app this is not allowed, and you’ll see this.
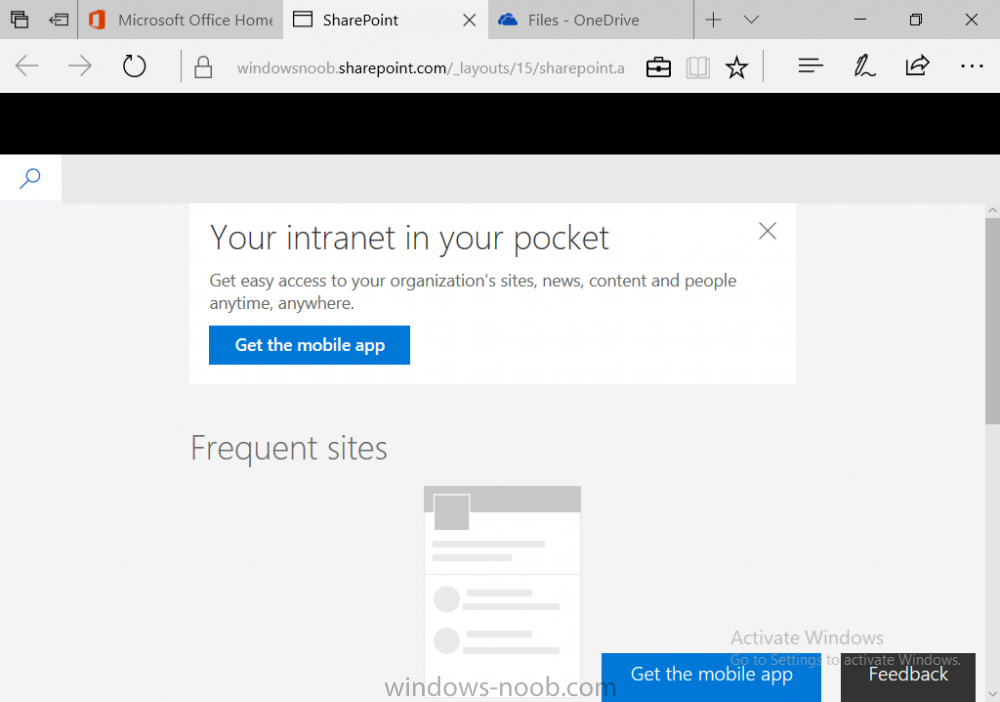
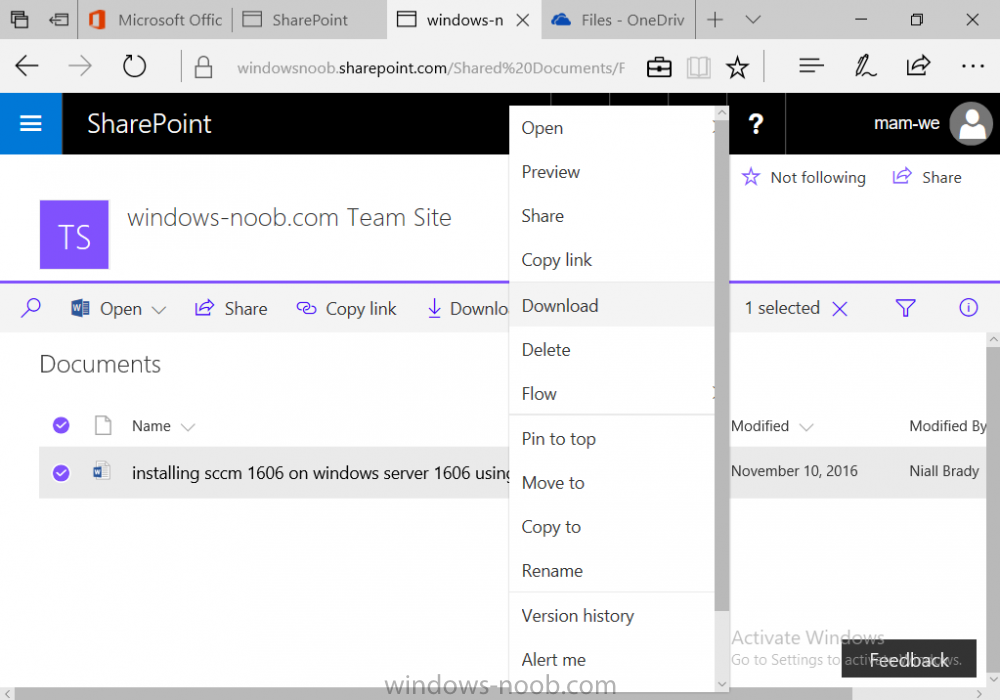
And next browse a work site (such as Sharepoint) in Microsoft Edge and you’ll again see the suitcase icon, notifying you that Edge realizes this is a Work network resource.
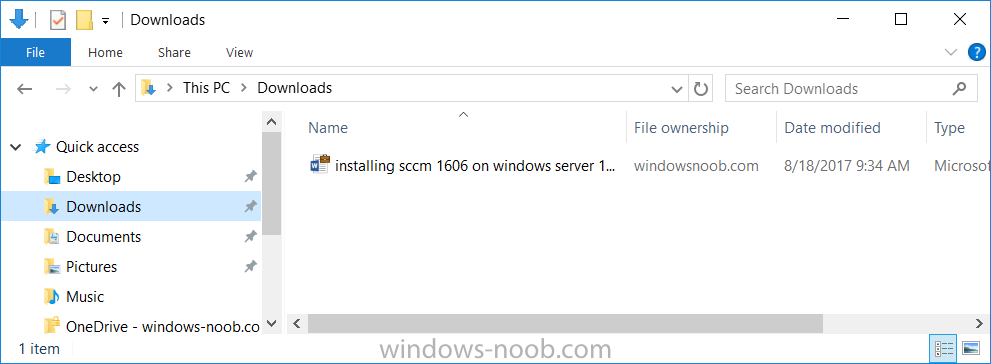
Downloading a document from Sharepoint automatically marks it as a Work document, and that means it’s protected.
as you can see here.
Once the BYOD project comes to an end, have the user disconnect the work or school account in Account settings, and any Enterprise data left on the device will be revoked and can no longer be read or used.
Hopefully this post helps you understand WIP capability on Windows 10 version 1703 devices (and later) that are not enrolled into MDM (MAM-WE) using policy created in Intune in Azure. I think we’ll see more happening in this space in the coming months, hopefully with native reporting in Azure along with selective wipe.
Until next time, adios.
