In this post we will take a look at switching between GUI and Server core in Windows Server 2012. One of the most interesting feature in Windows server 2012 is it allows you to switch from GUI mode to Core mode.
In other words GUI mode in windows server 2012 is optional, that means you can uninstall the GUI and install it back whenever required.
In the previous post we saw the installation of Windows Server 2012 in core mode, during the installation of windows server 2012 the user is asked to choose between server core installation and server with a GUI installation.
The benefits of installing windows server 2012 in core mode includes reduced attack surface, reduced maintenance, server consumes fewer hardware resources than server installed in GUI mode.
Note that when you browse the internet looking for switching between GUI and Core in server 2012 you might find the scripts written by IT professionals that will help you switch between GUI and Server core. In this post we will doing it without using any scripts.
Switching from Windows Server 2012 Core to GUI
I have installed Windows Server 2012 Datacenter Edition (Server Core Installation) on a virtual machine. I have mounted the Windows Server 2012 DVD on to the virtual machine.
Log in to the server with the administrator account and you must see a command prompt.
We will be creating two folders, Install and Mount. The folder Install will contain the Install.wim copied from the source DVD and folder Mount will contain the Install.wim, this folder is used for the purpose of mounting Install.wim.
Create two folders Install and Mount using mkdir command.
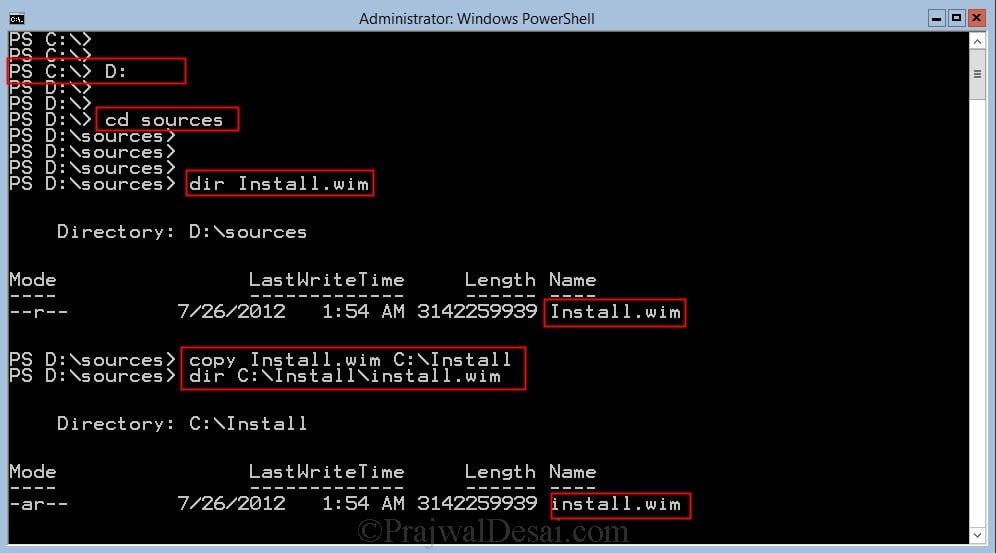
Change drive to where you have mounted Windows Server 2012 DVD.
In my case it’s the D drive where the DVD is mounted, next step is to change your directory to Sources where the Install.wim is present.
Lets get the details about the Image that we have mounted. Use the command “dism /get-wiminfo /Wimfile:<Path of .wim file>”.
In the below screenshot we can see that there are 2 editions of windows server 2012, Standard and Datacenter each with core and GUI mode.
We will be using Windows Server 2012 Datacenter edition for installing the server features. Make a note of Index number which will be helpful while mounting the file.
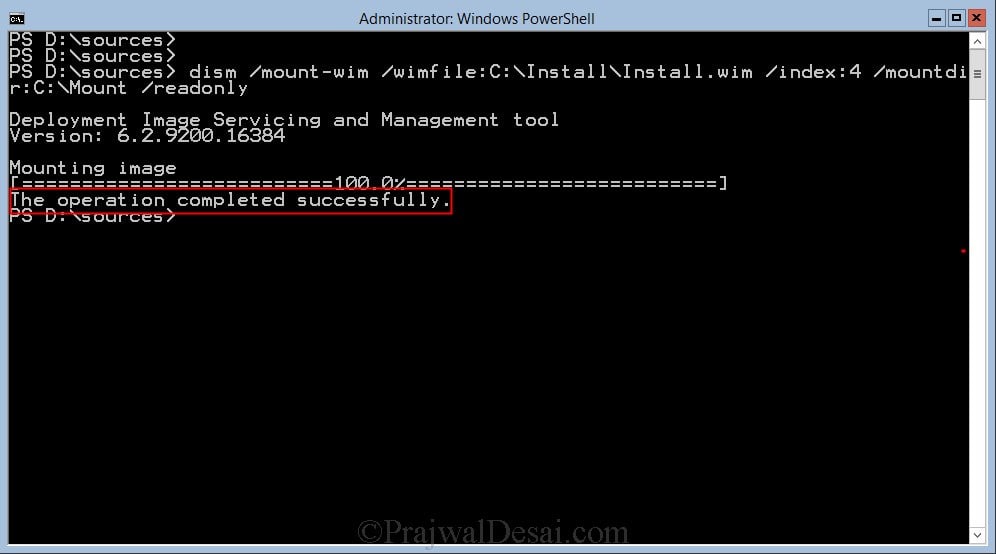
To mount the .wim file, use the command “dism /mount-wim /wimfile:<path of .wim file> /Index:Indexnumber /mountdir:<path where you want to mount the .wim file> /readonly”.
To install the GUI and Server Manager use the powershell command Install-WindowsFeature Server-GUI-Mgmt-Infra, Server-GUI-Shell -Source <“path to winsxs folder”>.
Always remember to specify the Source folder. The feature installation may fail if you don’t specify the source folder.
The feature installation now begins.
You must restart the computer.
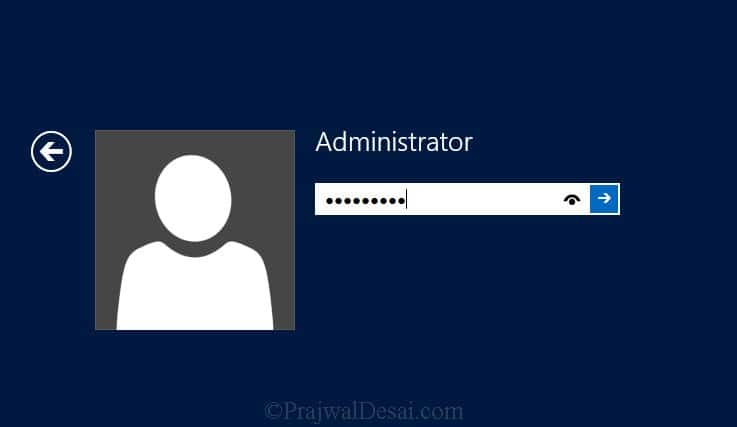
Login to the computer with the Administrator account.
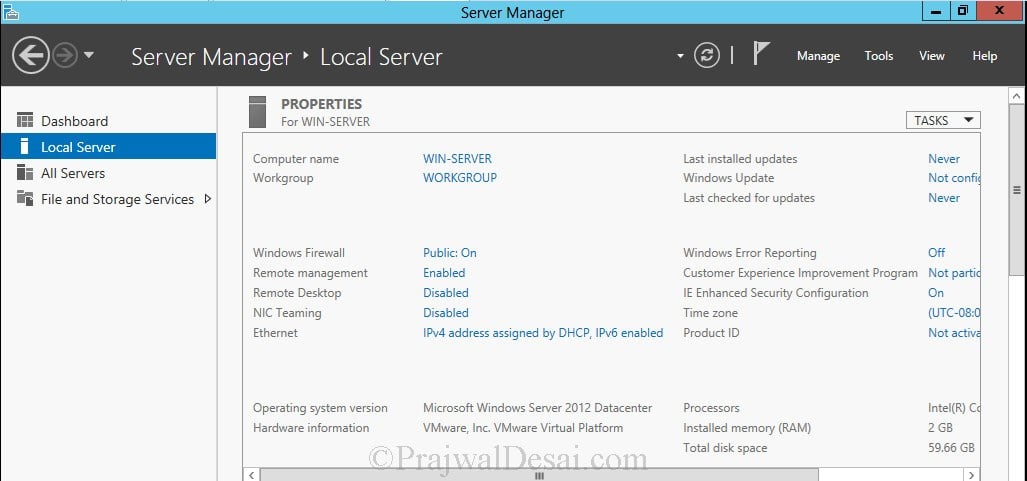
We see that the Server manager is installed and GUI too. We have switched from Server core mode to GUI mode successfully.
Switching from Windows Server 2012 GUI to Core
Now we know how to switch from server core mode to server GUI mode. Let’s now look how to switch GUI to Core mode. This is very simple and it doesn’t take much time to achieve this.
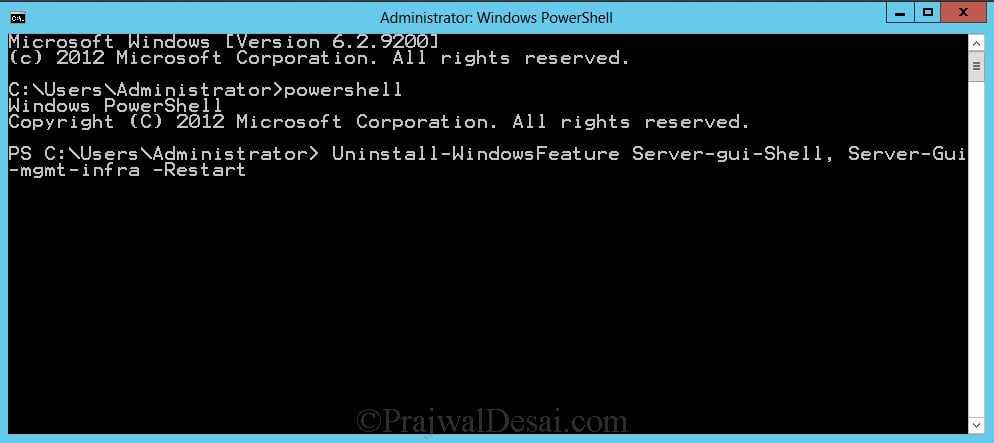
Open the command prompt and start the powershell. To uninstall GUI and Server Manager feature, type the command Uninstall-WindowsFeature Server-Gui-Shell, Server-Gui-Mgmt-Infra -Restart.
Note :- If you want only the server manager in the core mode you can skip Server-Gui-Mgmt-Infra from the above command.

