
This article will walk through a basic install and configuration for SQL Always On, to be leveraged by SCOM for higher availability.
This is no way aligned to Clustering and SQL best practices – just an example on how to set one up for a simple testing deployment.
The Server OS used will be Windows Server 2022.
The SQL version will be SQL 2019.
I’ll need to plan for some names and IP’s up front:
| Server Name | Role | IP Address |
| SQL01 | Virtual Machine, Node | 10.10.10.150 |
| SQL02 | Virtual Machine, Node | 10.10.10.151 |
| SQLCL01 | Cluster Name Object (CNO) | 10.10.10.152 |
| SQLAGL01 | SQL Availability Group Listener | 10.10.10.153 |
First, deploy two Virtual Machines running Windows Server 2022, with the following names:
- SQL01
- SQL02
I’ll set the Disk Configuration to have the following volumes:
- C: 128GB (OS)
- D: 128GB (APPS)
- G: 200GB (DATA)
- L: 100GB (LOGS)
I’ll format the D:, G: and L: volumes with 64k allocation unit sizes, which is optimized for SQL.

Next I will:
- Assign each server a name
- Set the IP address
- Set the DNS settings
- Reboot
Next I will:
- Add the computer to my domain
- Disable the Windows Firewall
- Set the Time Zone
- Enable Remote Desktop
- Add my SQL Administrators group to the Local Administrators group
- Reboot
Now I will log on to each server using a domain account that is a SQL Administrator, so I can Install SQL and configure the Cluster.
I will map a drive to my SQL media, and install SQL server.
Then I will install the Failover Clustering Feature
Next I will pre-create the Cluster Computer Account in the domain for the Cluster Name Object (CNO). Normally your Active Directory administrators would do this.
I need to disable the account and assign FULL CONTROL to the user account performing the cluster installation on the CNO. My CNO will be named “SQLCL01”. My user account doing the install of SQL and Clustering is OPSMGR\sqladmin.

Then I can create the cluster. Run this ONLY ON ONE OF THE NODES.
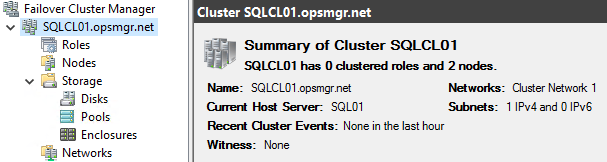
You can open Failover Cluster Administrator and see your new Cluster at this point:
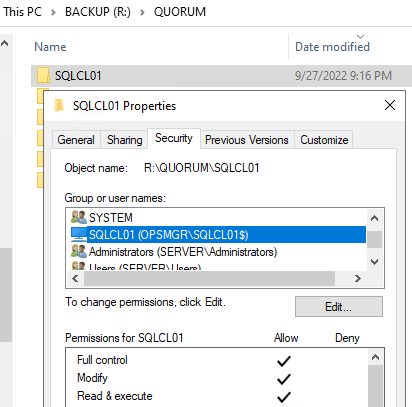
We need to configure a File Share Witness for the cluster. Create a share and a folder for this cluster. Assign FULL CONTROL rights to the folder, for the CNO:
At this point I will enforce my TLS 1.2 only communications, which is a best practice. This is not a requirement.
At this point – reboot each node.
Next – we need to enable Always On for the SQL instance on each node:
Configure SQL Always On Availability Group
Now – we need to configure the Always On availability group.
FIRST – we need to pre-stage a Computer Account in the Domain for the Always On Availability Group Listener. Once we create this account (SQLAGL01$), we need to assign FULL CONTROL on this object to the CNO Computer account (SQLCL01$).
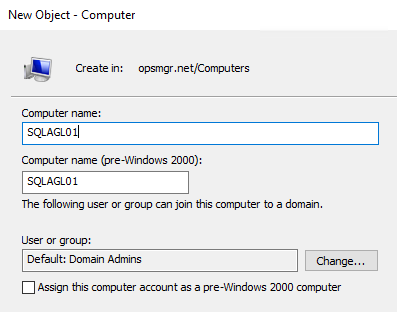
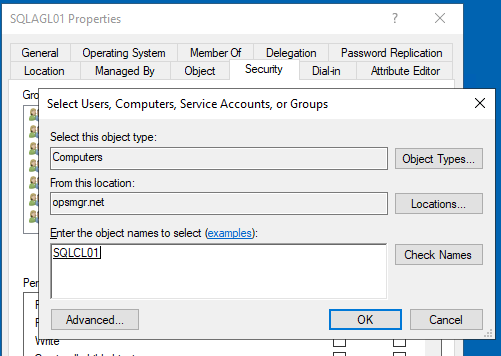

This will allow the Cluster to be able to manage the computer account for the AG Listener.
Next – open SQL Management studio from anywhere you have it installed.
Connect to the SQL01\INST01 SQL instance:

First, we need to create a “dummy” database ONLY on SQL01\INST01 which is required to configure and test Always On.
Go to Databases, right click, and choose New Database. Name the Database “TESTDB” and click OK.
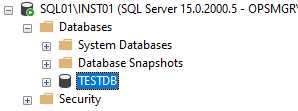
Before we can use a database in Always On, it has two requirements:
- The database must be in FULL recovery model.
- The database must have a FULL Backup.
Right click the TESTDB database, and choose Properties, then select Options. Make sure the Recovery Model is FULL. Click OK.
Right click the TESTDB database, and choose Tasks > Backup. Run a FULL backup.
Now expand “Always On High Availability”, and Right Click “Availability Groups” and choose “New Availability Group Wizard”

Assign an Availability Group name. This isn’t terribly important. I will use “SQLAG01” then check the box next to “Database Level Health Detection” and click Next.

Check the box next to your Test Database and click Next.

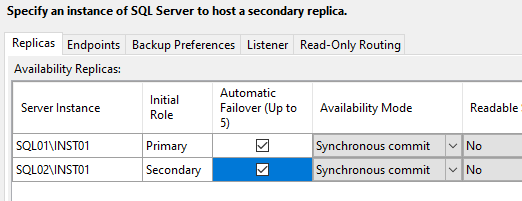
Add a replica, and choose your other server, SQL02. Check the boxes next to Auto failover and Synchronous commit on both servers.
On the Listener tab, select “Create an availability group listener”. I will use “SQLAG01” I will use port 1764 (use whatever your standard is).
Choose Static IP and ADD and input your predetermined static IP for your Availability Group Listener.
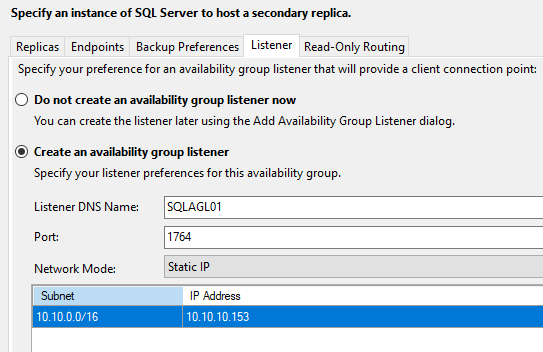
Click Next.
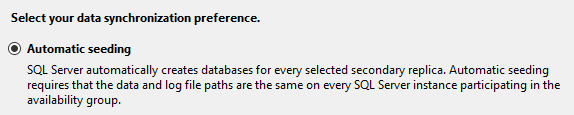
Choose Automatic Seeding to automatically sync the database and click Next:
We will run some tests:
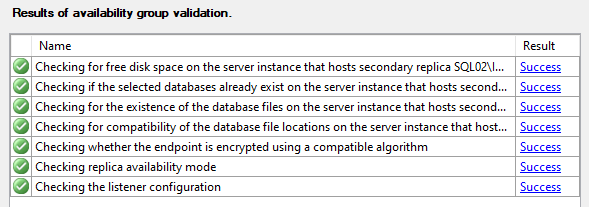
Click Next. Click Finish.
Click “More Details” and see that everything was a success.
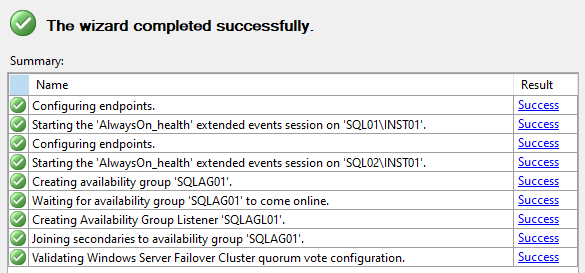
The most common failures are creating the Availability Group Listener. This is almost always a failure to pre-stage the computer account and apply the rights needed. Please see the section “To pre-stage an account for a clustered service or application” at: Failover Cluster Step-by-Step Guide: Configuring Accounts in Active Directory | Microsoft Learn
Go into SQL Management studio and look over your configuration:

Now – lets test a planned failover.
On SQL01\INST01, right click the Availability Group and choose Failover

You should not have any errors and be able to fail over with no data loss because these are synchronized:

You will see the availability group on SQL01 switch to Secondary. SQL02 is now the primary:

Set up SQL Maintenance
We need to set up SQL maintenance if your DBA’s have no already configured this. Since our databases will be in an AlwaysOn Availability Group, they will be in FULL recovery model and we require frequent transaction log backups or they will fill. We also need to configure backups, indexing, etc.
I prefer to use Ola Hallengren’s solution for this: https://ola.hallengren.com/
Download the MaintenanceSolution.sql from there and then open it in SQL management studio. Then read the instructions at https://ola.hallengren.com/frequently-asked-questions.html
In SQL Management Studio – we need to edit this file and configure our settings for file cleanup time in hours and backup directory:
Defaults:

Changes for this deployment:

Then I Execute this file to create all the jobs. Run this on BOTH SQL servers/instances:
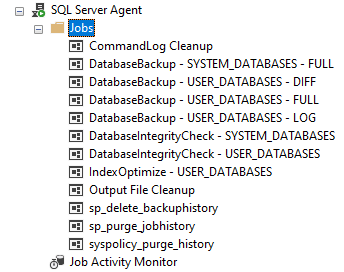
Now – we need to test these jobs manually – then schedule them.
Run the “DatabaseBackup – USER_DATABASES – FULL” by right clicking and start job at step….

And verify the backup was a success:

Repeat this for TLOGS, Index Maintenance, and Output File Cleanup jobs.
Now we need to schedule these jobs.
In SQL Management Studio, under SQL Server Agent – Right Click “Jobs” and choose “Manage Schedules”
Create 4 new schedules based on the following:
- Daily at 9 PM
- Daily at 10 PM
- Daily at 11 PM
- Hourly

Then schedule each job by opening the job, and Picking an existing schedule – according to the following:
- DatabaseBackup – USER_DATABASES – LOG (Hourly)
- Output File Cleanup (Daily at 9 PM)
- DatabaseBackup – USER_DATABASES – FULL (Daily at 10 PM)
- IndexOptimize – USER_DATABASES (Daily at 11 PM)
Repeat the schedule creation and job scheduling on the second node.
Testing connectivity
Lastly – test connectivity to the listener, as all applications connecting to a Database replica in an AG should use the listener. In my case, my connect string t is “SQLAGL01.opsmgr.net,1764”
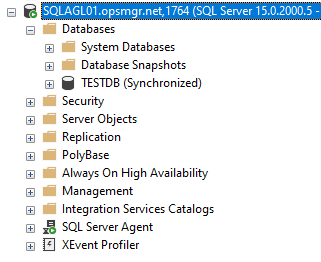
When I install SCOM, I will point the SCOM database setup page to this connect string. I will still need to go back and set the SCOM database to full recovery model, back it up, and then add it to the Availability group.