The Microsoft Exchange Server Auth Certificate is installed when you install an Exchange Server, and it’s 5 years active. Most of the time, you don’t look into that certificate because, within 5 years, you will have a new Exchange Server and decommission the old Exchange Server. What if you accidentally removed the certificate, or it’s giving an error? In this article, we will look at how to renew Microsoft Exchange Server Auth Certificate and check that it’s valid.
Exchange Server certificates
There are three default certificates created when Installing Exchange Server:
- Microsoft Exchange (self-signed)
- WMSVC or WMSVC-SHA2 (depends on the Exchange Server version) (self-signed)
- Microsoft Exchange Server Auth Certificate (self-signed)
In addition to the above default self-signed certificates, you must install a third-party certificate which you obtain from a certification authority (CA) on the Exchange Server:
Check Microsoft Exchange Server Auth Certificate
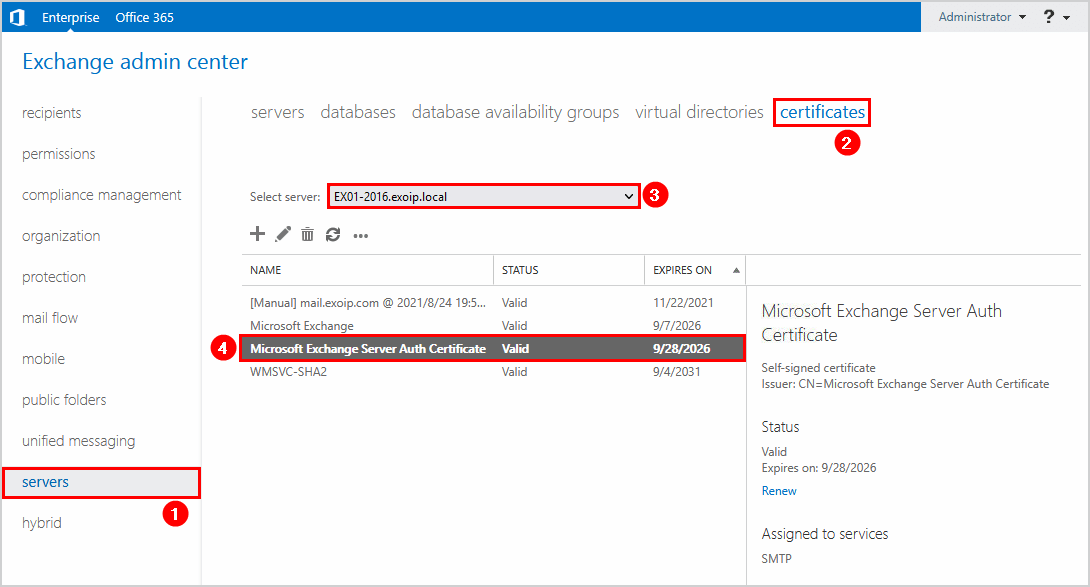
Sign in to Exchange Admin Center on-premises. Navigate to servers > certificates. Select the Exchange Server if you have more than one Exchange Server running in the organization. Double-click the Microsoft Exchange Server Auth Certificate.
In our example, we did select the Exchange Server EX01-2016.
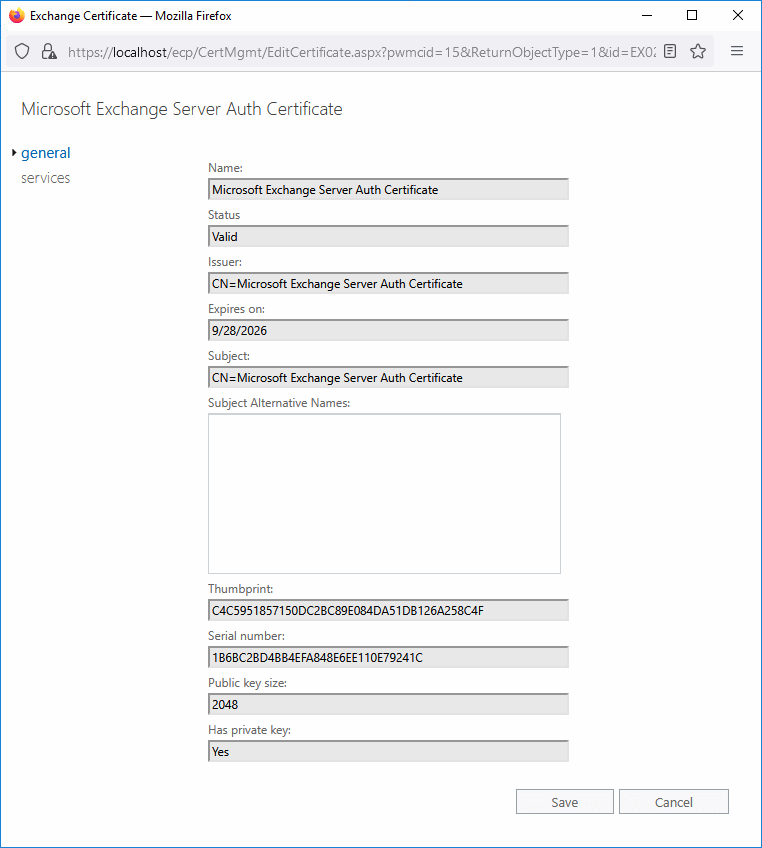
We do see that the certificate thumbprint starts with C4C595.
Let’s verify the Exchange Server certificate with Exchange Management Shell.
Run Exchange Management Shell as administrator on Exchange on-premises. Run the command to check the status of the existing OAuth certificate.
The output below appears.
Let’s say the Exchange Server Auth Certificate is corrupt or not valid. Perhaps you don’t see the Exchange certificate with the above steps. In the next step, we will renew the Exchange Server Auth Certificate.
How to renew Microsoft Exchange Server Auth Certificate
Let’s have a look at the steps on how to renew Microsoft Exchange Server Auth Certificate. Run the commands below in Exchange Management Shell.
Note: You can’t remove the Exchange Server Auth Certificate in most cases. That’s ok, and you will be able to remove the old certificate when you create and publish a new Exchange Server Auth Certificate.
1. Create new Microsoft Exchange Server Auth Certificate
Create a new Microsoft Exchange Server Auth Certificate. Run the New-ExchangeCertificate cmdlet.
If it asks you to overwrite the certificate that’s already there, press Y and press Enter.
Copy the new certificate thumbprint because you need it in the next step. In our case, it’s the certificate thumbprint that starts with 67D37D.
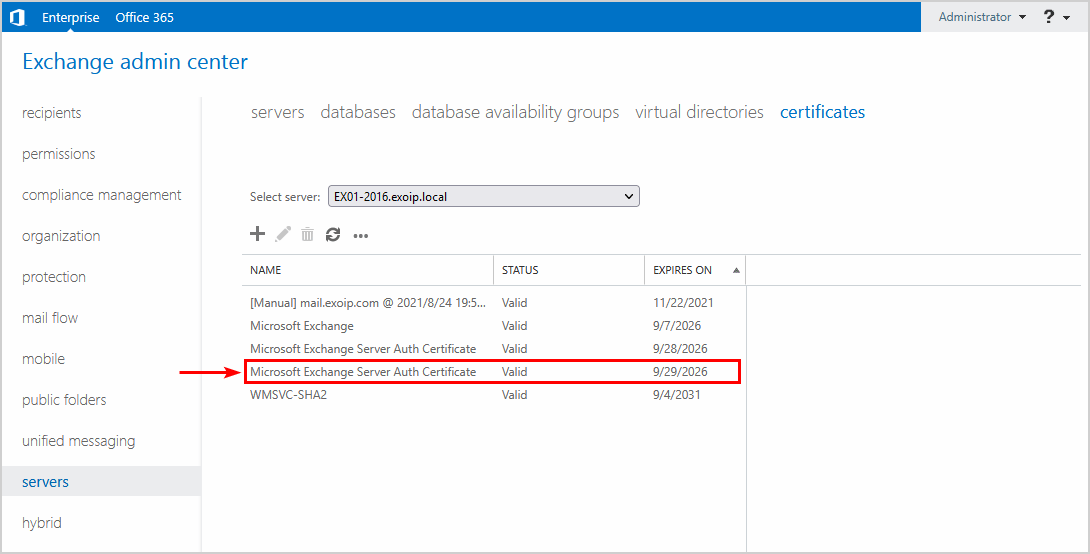
You can verify in Exchange Admin Center that the command created the new Microsoft Exchange Server Auth Certificate.
Note: The certificate will be created on all the Exchange Servers (if you have more than one Exchange Server running in the organization).
2. Set new certificate for server authentication
The Set-AuthConfig parameter defines Microsoft Exchange as a partner application for server-to-server authentication with other partner applications such as Microsoft SharePoint 2013 and Microsoft Lync 2013 or Skype for Business Server 2015.
Paste the certificate thumbprint which you copied in the previous step in the command.
If you select the current day date, you will get a warning that the new effective date is not 48 hours in the future. Press Y and press Enter.

The PublishCertificate switch specifies that the specified certificate be immediately rolled over as the current certificate. The certificate is deployed immediately to all Client Access servers.
The ClearPreviousCertificate switch clears the certificate saved as the previous certificate in the authorization configuration.
3. Restart Microsoft Exchange Service Host Service
Restart the Microsoft Exchange Service Host Service
4. Restart IIS (Internet Information Services)
Run the IISReset command to restart IIS.
Another way is to recycle the Outlook on the web and EAC application pools.
5. Remove old Microsoft Exchange Server Auth Certificate
Remove old Microsoft Exchange Server Auth Certificate from Exchange Admin Center or with PowerShell.
Note: Do this on all the Exchange Servers.
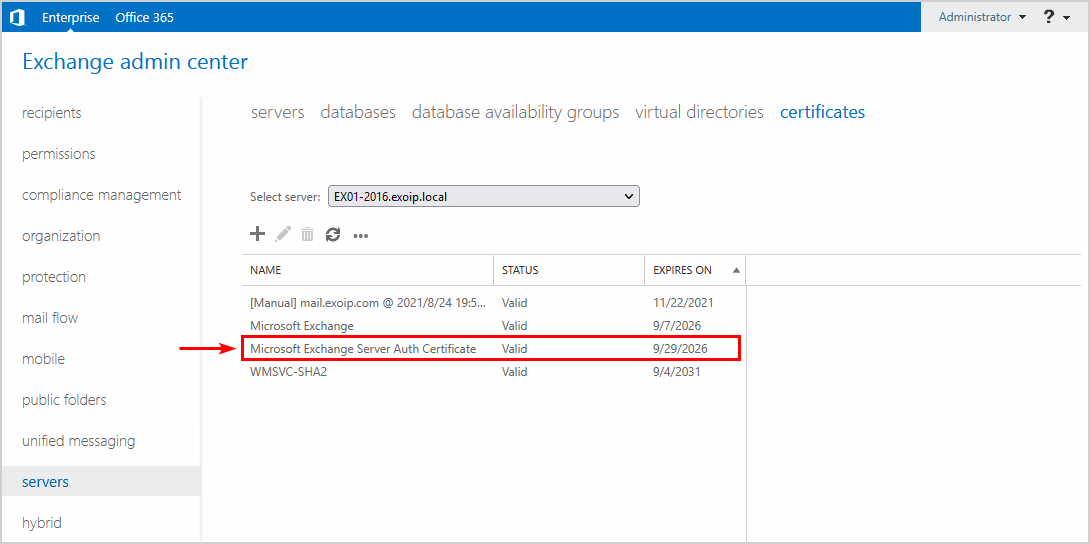
You will only have one Microsoft Exchange Server Auth Certificate on each Exchange Server.
Important: In some environments, it may take a couple of hours for the OAuth certificate to be published.
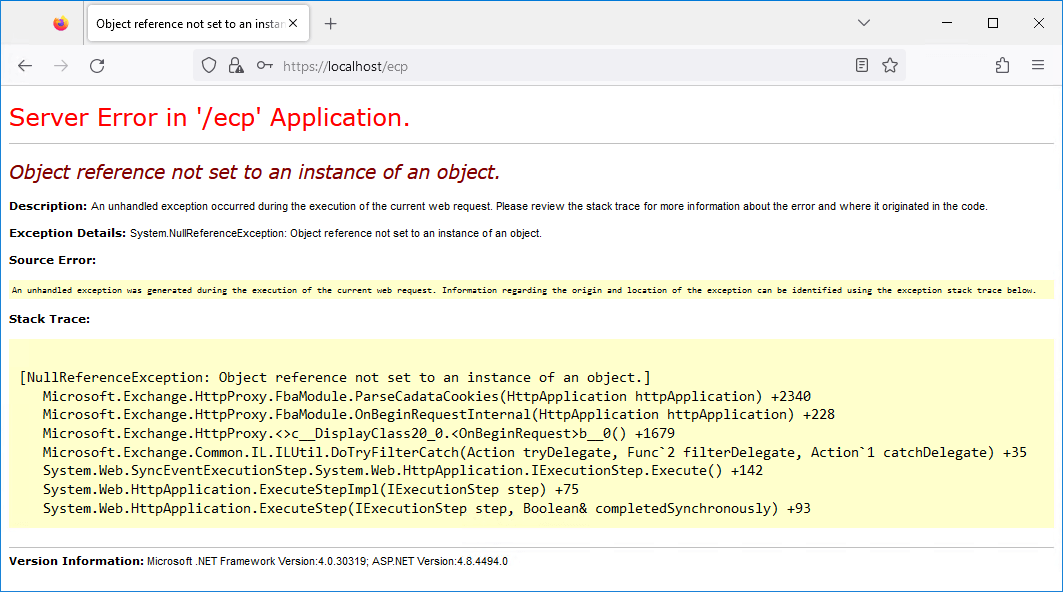
An ECP error appears when you want to connect to the Exchange Admin Center. After waiting a few hours, you can successfully sign in without getting the error below.
6. Rerun Hybrid Configuration Wizard
If you have an Exchange Hybrid setup, you have to rerun the Hybrid Configuration Wizard to update the changes to Microsoft Entra ID.
7. Verify Microsoft Exchange Server Auth Certificate validity
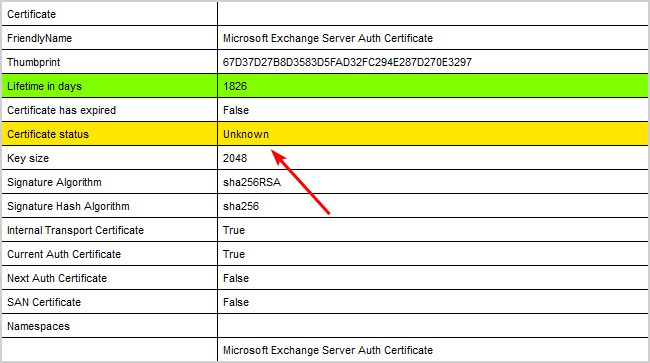
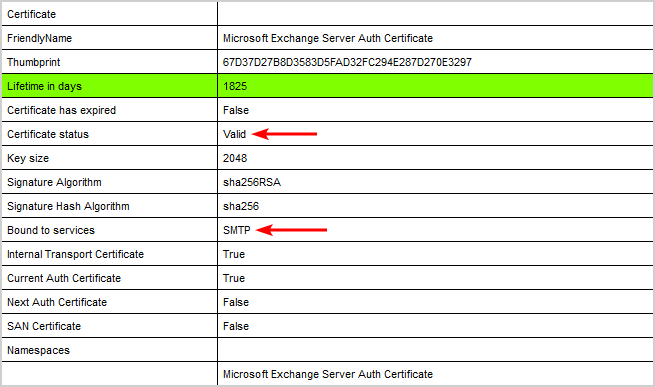
Run the Exchange Server Health Checker script to verify that the Microsoft Exchange Server Auth Certificate status is valid.
This is how it immediately looks after you install the new Exchange Auth certificate. All the certificate statuses appear as Unknown.
Give it a maximum of 24 hours and run the health checker script again. All the certificate statuses appear as Valid and the Microsoft Exchange Server Auth Certificate is bound to services SMTP.
That’s it!
Read more: Renew certificate in Exchange Hybrid »
Conclusion
We showed how to renew the Microsoft Exchange Server Auth Certificate. First, go through the steps as shown to renew the Auth Certificate. After that, you can remove the old Auth certificate. If you have an Exchange Hybrid deployment, rerun the Hybrid Configuration Wizard. As always, verify that the new Microsoft Exchange Server Auth Certificate is valid by running the Exchange Health Checker script.